Installation Instructions - Enoteca Demo Site for Episerver Commerce 1 R2 SP1
| Product version: | Episerver Commerce 1 R2 SP1 |
|---|
|
Document last saved:
|
|
This document describes how to install the Episerver Enoteca (Wine Store) sample site using the Episerver Deployment Center.
EPiServer Enoteca (Wine Store) sample package for EPiServer CMS 6 R2 is available for download, containing the following products and modules out-of-the-box:
- EPiServer CMS 6 R2
- EPiServer Commerce 1 R2 SP1
- EPiServer Mail 5 R2
- Enoteca Wine Store sample templates and content
Table of Contents
Prerequisites
The following applies to the EPiServer Enoteca demo site:
NOTE EPiServer Mail is required for the website newsletter function, as well as the receive newsletter option when registering an account.
Downloading and Running the Installation Package
Download and run the installation package for EPiServer Enoteca (Wine Store) as follows:
- Download the EPiServer Enoteca (Wine Store) installation package from EPiServer World (login access required), and unzip and run the .msi file.
- Accept the terms of the license agreement and click OK.
- When the Setup Wizard appears, click Next to continue with the installation.
- Click Install to begin, and complete the installation procedure.
Installing the EPiServer Enoteca Demo Site
Install the EPiServer Enoteca (Wine Store) sample site as follows:
-
Open EPiServer Deployment Center (Start > Programs > EPiServer).
-
-
-
-
Install the EPiServer Enoteca (Wine Store) sample package. The sample content, page types and product catalog will be imported to the site.
NOTE When installing the site, around 3000 product images will be imported, therefore it might take up to 10 minutes to install the package. If you receive an error message during the installation saying "Error - Browser not loaded after 60 delays", simply navigate to http://{WineStoreSite}/Edit/WineStoreInitialization.aspx.
This page will set up data for page type, gift card, and some views for organization. After the page has successfully loaded, go to the Edit folder in the root folder of the Enoteca Wine Store, and delete the file WineStoreInitialization.aspx.
Remove Invalid Comments Scheduled Job
A scheduled job is a service that can be executed repeatedly at a given time interval or when an administrator manually executes it through the administrator interface in EPiServer CMS. In the following the Remove Invalid Comments scheduled job for the Enoteca demo site is described.
Why Remove Product Comments
When a product is no longer available in the system, comments associated with the deleted product can be removed from the system by this scheduled job, in order to maintain system accuracy and avoid orphans in the database.
Running the scheduled job
- Login as an administrator and navigate to the EPiServer CMS Admin interface.
- Select Remove Invalid Comments under Scheduled Jobs.
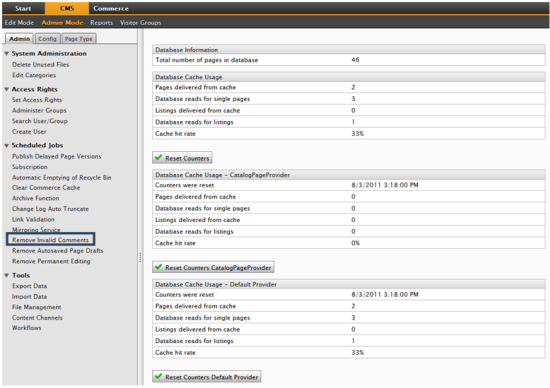
- Click Start Manually to execute the job and clear the cache.
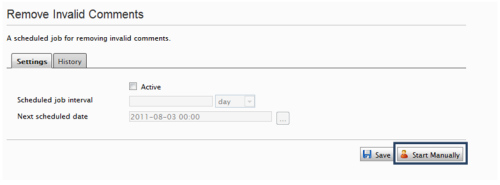
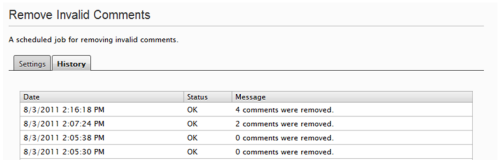
- A message will inform about the resulting number of comments that were removed.
Connect to Facebook Configuration Settings
This section describes the configuration steps to set up a Facebook connection for the website.
1. Create a new Facebook application
- Go to https://developers.facebook.com/apps
- Click “+ Create New App” and enter: “Enoteca Wine Store” text in the “App Display Name” text box.
- Check the “I agree to the Facebook Platform Policies” check box.
- Click “Continue”.
- On the “Settings/Basic” page: Save the “App ID” value at the top of the page, for example: 247258371990368. This is used in the Enoteca Wine Store configuration settings in the web.config file.
- In the “Basic Info” section, the “App Domain” text box, enter the Enoteca Wine Store domain, for example ex: www.enoteca.com, for test on local: localhost.
- In the “Select how your app integrates with Facebook” section, in the “Website” item, enter the site URL in the “Site URL” text box, for example: http://www.enoteca.com.
- Click “Save Changes”.
- On´the “Settings/Advanced” page, the “Authentication” section, in the “Deauthorize Callback:” text box, enter the Enoteca Wine Store URL, for example http://www.enoteca.com, for test on local: localhost.
- Click “Save Changes".
2. Configure the settings to send e-mail by SMTP
In order to use the "Connect to Facebook" feature, a proper configuration of SMTP to send confirmation e-mail needs to be configured. Please refer to the "Installing EPiServer Mail onto a Website" section in the installation instructions for EPiServer Mail 5 R2, for SMTP configuration settings.
3. Configure the Enoteca Wine Store website to enable Connect to Facebook
- Open the web.config file, and navigate to “/configuration/appSettings/FacebookAppId”
- Change its value attribute to the "App ID" value retrieved in previous steps, for example 247258371990368.
4. Test the settings locally
- Navigate to and open following file on your machine:
C:\Windows\System32\drivers\etc\hosts
- Add the following line to its content: 127.0.0.1 localhost
- Open your installed Enoteca Wine Store site in a browser with:
http://localhost:[installed port]/, and verify that it works.
Related Information