Load balancing deployment
Note: This feature has been obsoleted in the latest version of the product.
Introduction
This document describes how to install a new node of EPiServer Commerce in an environment where load balancing is used. The installation is done from the EPiServer Deployment Center.
Prerequisites
The following is needed before you start the installation:
- A working EPiServer Commerce site, with or without Commerce Manager, running on a "server A". The EPiServer CMS and Commerce versions must match the version that will be installed on a "server B" (see below).
- It is not supported to install EPiServer Commerce load balancing on a database shared between Commerce applications. Make sure you disable all other Commerce applications before proceeding. You can go to <eCF database>\dbo.Application and set the IsActive value of other applications to 0.
- The site on server A must be configuration ready for load balancing. Since by default CMS sites do not support load balancing, the configuration needs to be modified for content and cache updates, shared VPP data and authenticated/unauthenticated session states. Refer to EPiServer World for more information.
- From server B, you must have access rights to the databases of sites that are running on server A.
Installation
Do the following to install EPiServer Commerce for load balancing:
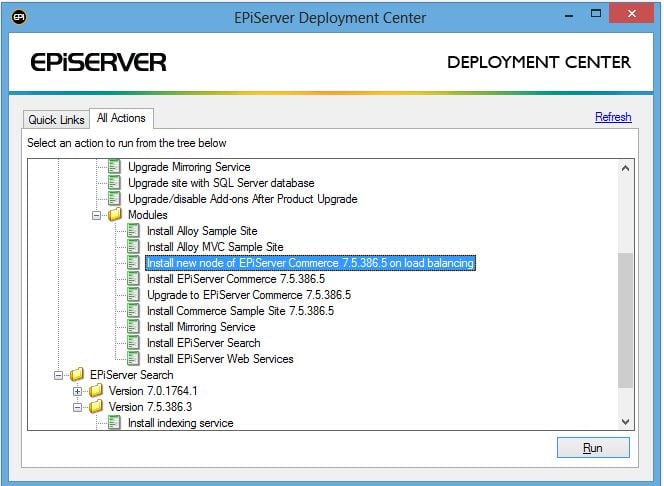
1. Open the EPiServer Deployment Center, go to the appropriate version of EPiServer CMS and expand Modules section to see the options.
2. Select the "Install new node of EPiServer Commerce ... on load balancing" option and click Run.
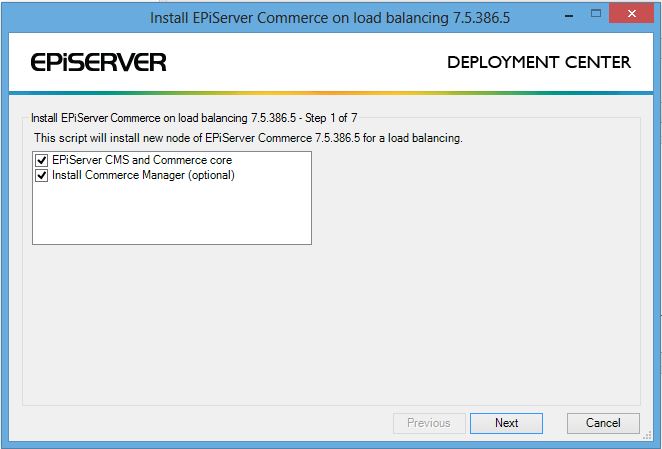
3. When selecting this option, you will be able to choose installation features for the new EPiServer Commerce site:
- EPiServer CMS and Commerce core - this option is mandatory and will always be selected.
- Commerce Manager - optional.
Click Next to continue.
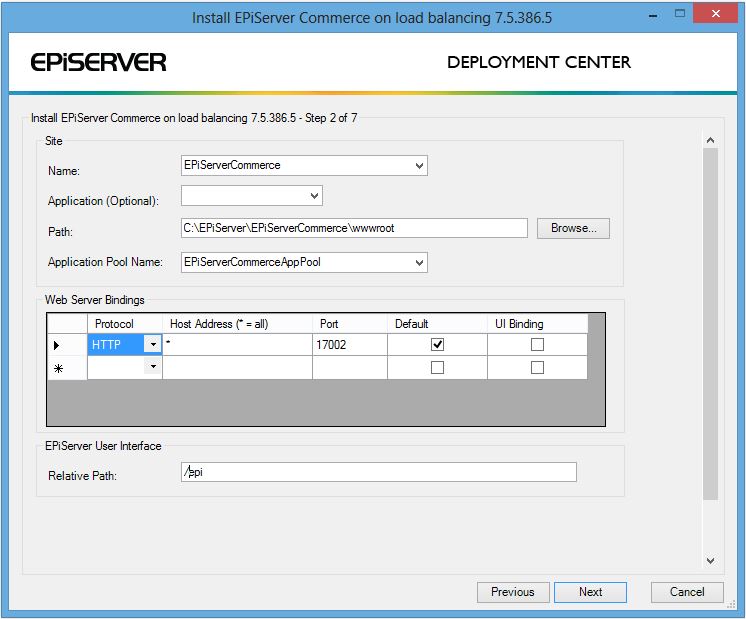
4. In this step you will choose the options for the CMS site. Refer to the installation instructions for EPiServer CMS on EPiServer World, if more information is needed here. Click Next to continue.
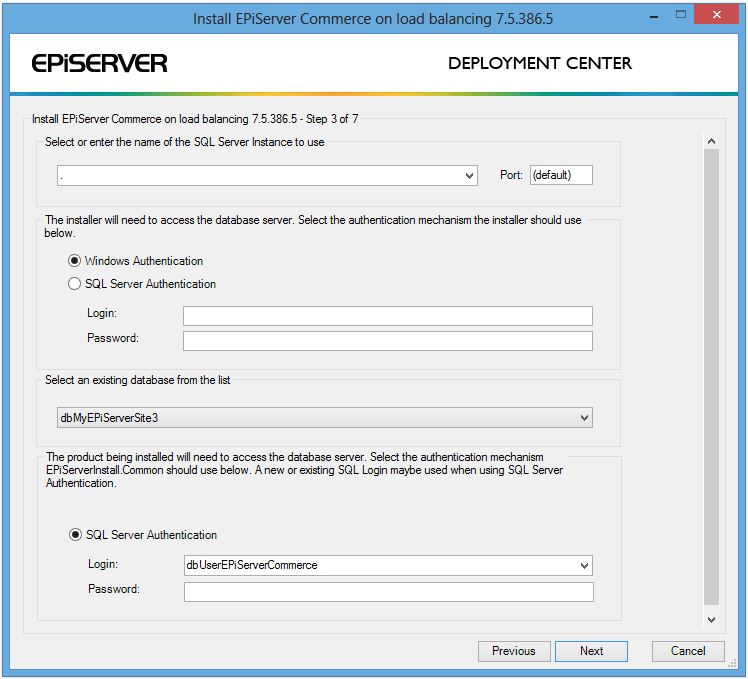
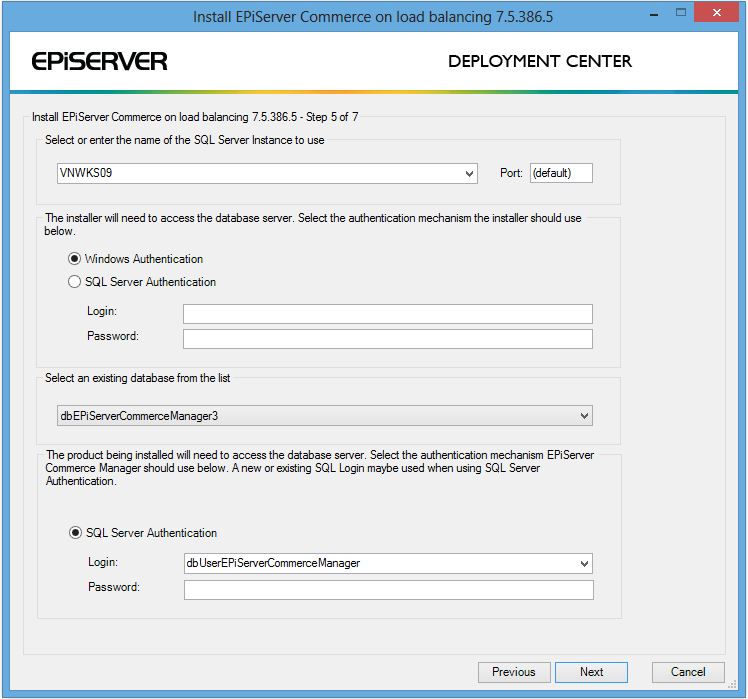
5. Choose the options for the CMS database. Note that this must be the CMS database that is being used on site A. Be careful to select the right database, since in this step there is no mechanism to verify the selected CMS database. The login can be new or existing. Click Next to continue.
6. Select an EPiServer license file to use (optional at this point).
7. Choose an existing Commerce database, the one that is being used on site A, which must be a valid, working database of EPiServer Commerce. The login can be new or existing. Click Next to continue.
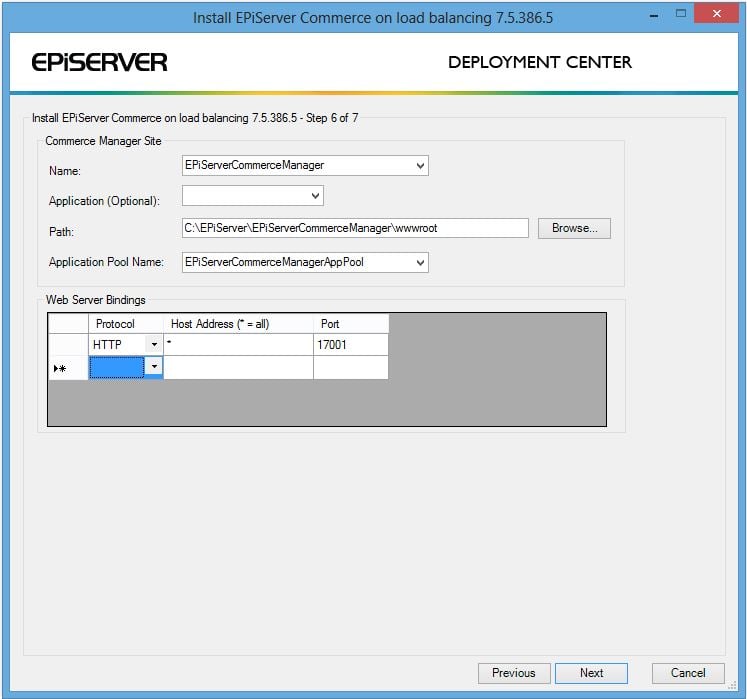
8. The information in the next step is only displayed if you choose to install Commerce Manager. You will need to input all the information. Click Next to continue.
9. In the final step a summary of the installation is displayed, click Next and wait for the installation to finalize.
Configuration
This section describes the manual configurations needed after the installation.
Sharing the Lucene search index folder
By default, the LuceneSearchProvider stores the search index folder locally. Do the following to allow two or more load balancing sites to share the same search index:- Move the search index folder (\App_Data\SearchIndex) of site A to a shared location. The search index folder is originally located at the Commerce Manager site folder if Commerce Manager is installed, or at the front-end site folder if Commerce Manager is not installed.
- Update the LuceneSearchProvider section in the <Front-end site A folder>\Configs\Mediachase.Search.config:
<add name="LuceneSearchProvider" type="Mediachase.Search.Providers.Lucene.LuceneSearchProvider, Mediachase.Search.LuceneSearchProvider" queryBuilderType="Mediachase.Search.Providers.Lucene.LuceneSearchQueryBuilder, Mediachase.Search.LuceneSearchProvider" storage="<SharedSearchIndexFolder>App_Data\SearchIndex" simulateFaceting="true" /> - Update the Indexers basePath to the shared search index folder:
<Indexers basePath="<SharedSearchIndexFolder>App_Data\SearchIndex"> <add name="catalog" type="Mediachase.Search.Extensions.Indexers.CatalogIndexBuilder, Mediachase.Search.Extensions" /> </Indexers> - If Commerce Manager is installed, update the <Commerce Manager site A folder>\Configs\Mediachase.Search.config as above.
- After installing site B and if Commerce Manager is installed, update <Front-end site B folder>\Configs\Mediachase.Search.config and <Commerce Manager site B folder>\Configs\Mediachase.Search.config, if Commerce Manager is installed.
- Allow read and write access for the site B application pools (both front end site and Commerce Manager site) to the shared location folder.
Sharing assets
Do the following to allow two or more load balancing sites to share the same assets:
- Move the BlobStorage folder of site A to a shared location. The BlobStorage folder is originally located at Commerce Manager site folder if Commerce Manager is installed, or at front-end site folder if Commerce Manager is not installed.
- Update the storageProvider section in the <Front-end site A folder>\Configs\baf.config:
<add name="DiskBlobStorageProvider" type=" Mediachase.BusinessFoundation.Blob.DiskBlobStorageProvider, Mediachase.BusinessFoundation" allowSearch="False" basePath="<SharedLocation>\BlobStorage" /> <add name="SqlBlobStorageProvider" type=" Mediachase.BusinessFoundation.Blob.SqlBlobStorageProvider, Mediachase.BusinessFoundation" allowSearch="True" /> <add name="PublicDiskBlobStorageProvider" type=" Mediachase.BusinessFoundation.Blob.PublicDiskStorageProvider, Mediachase.BusinessFoundation" allowSearch="False" basePath="<SharedLocation>\BlobStorage\Public" /> - If Commerce Manager is installed, update the <Commerce Manager site A folder>\Configs\baf.config as above.
- After installing site B and if Commerce Manager is installed, update <Front-end site B folder>\Configs\baf.config and <Commerce Manager site B folder>\Configs\baf.config.
- Allow access (read and write) for the site B application pools (both front end site and Commerce Manager site) to the shared location folder.
Updating hashAlgorithmType
EPiServer 7.5 will use HMACSHA512 as default hashAlgorithmType, which has changed from previous releases. Therefore if one (or more) of your sites are upgraded from the previous release, and the other(s) are new EPiServer Commerce 7.5 sites, make sure all of them have the same hashAlgorithmType, or users might not be properly authenticated.
Other configurations
The installation will set the VPP folder to a hard coded value, for instance C:\EPiServer\VPP\<YourSiteName>.
Commerce Manager, if installed, will not have any load balancing. This means that although the sites share the same database, they will still be separate sites.
Deploying templates
After the installation you will have a core Commerce site, and you will need to deploy the templates to the site to make it up and running. As the two sites will share data, including users, catalogs and orders, you will only need to deploy files and configurations. You will not need to import catalog or data packages.
See also
Last updated: Oct 21, 2014