Don't miss out Virtual Happy Hour this Friday (April 26).
Try our conversational search powered by Generative AI!
AI OnAI Off
Don't miss out Virtual Happy Hour this Friday (April 26).
Mirroring usually occurs between two sites, so you have to install two sites: one as a source site and one as a target site. You can use each site as a source site or a target site regardless of the purpose from the beginning.
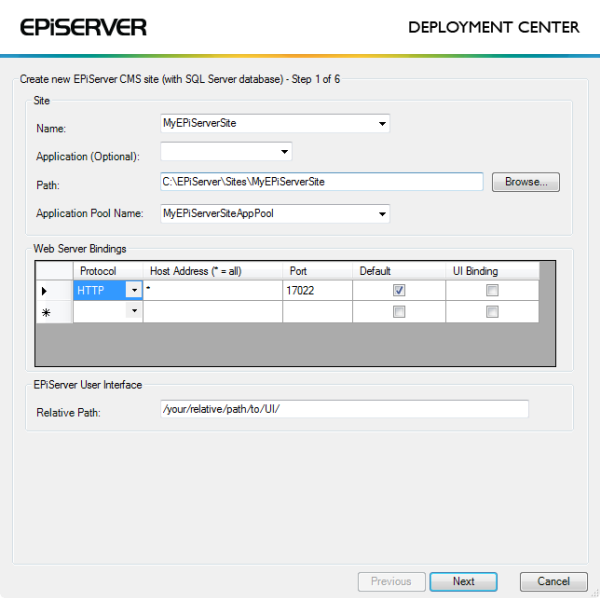
The installation package for Episerver contains a setup file (setup.exe) that installs the Deployment Center and Episerver CMS. Alternatively, you can run EPiServerShared.msi and EPiServerCMS.msi instead of the setup file.
Note: You can install mirroring only on Episerver CMS 7.5 (through the Deployment Center). If you want mirroring with the latest Episerver version, install a CMS 7.5 site with mirroring, and then upgrade to the latest CMS through NuGet because there is no NuGet package for mirroring functionality; it is installed as a separate service in a virtual directory on the server. An updated DLL is available in the EPiServer.CMS.Core NuGet package (packages/EPiServer.CMS.Core.9.0.0/tools/MirroringService/), which you must manually patch to support CMS 9.
Note: Episerver CMO and Episerver Commerce do not support mirroring. Also, content mirroring is not supported in a cloud deployment such as Windows Azure Web Apps and Episerver Digital Experience Cloud (DXC).
To install Mirroring on an existing Episerver CMS site, the site must be running on the same version as the mirroring DLL (EPiServer.MirroringService.dll).
Create a page that acts as the root page for the mirrored pages on the target site in the Episerver CMS editorial interface. You also can use an existing page as the mirroring root page.
Create and edit channels on the source site for mirroring in the Episerver CMS administrative interface. See the section about configuring mirroring in the Episerver CMS User Guide.
Start the mirroring process manually, or automatically as a scheduled job, in the Episerver CMS administrative interface. See the section about running the mirroring service scheduled job in the Episerver CMS User Guide.
To change the security credentials that are used when a Mirroring job is run, open web.config for the source mirroring application. Locate the episerverMirroring element in the configuration file and change the credentials in the MirroringTransferServer provider.
<episerverMirroring>
   <mirroringTransfer defaultProvider="MirroringTransferServer">
       <providers>
           <add
               defaultEndpointName="mirroringTargetEndPoint"
               numberOfPagesInPackage="500"
               numberOfFilesInPackage="100"
               destinationPath="c:\temp\mirroring\"
               chunkSize="4194304"
               name="MirroringTransferServer"
               type="EPiServer.MirroringService.MirroringTransferProtocol.WCF.MirroringTransferClient,EPiServer.Enterprise"
               username="XXXX"
               password=""
               domain="ep" />
               sourceConnectionStringName="" />
               destinationConnectionStringName="" />
         </providers>
       </mirroringTransfer>
   <mirroringMonitoring offlineLoggningEnabled="true" offlineLogPath="Path to offline log"/>
</episerverMirroring>| Configuration | Description |
|---|---|
| defaultProvider | To use a mirroring provider other than the built-in provider, enter the provider in the episerverMirroring section and set the defaultProvider to the provider you want to run. |
| numberOfPagesinPackage | Indicates the max number of pages in package. Default: 500. |
| numberOfFilesInPackage | Indicates the max number of files in package. Default: 100. |
| destinationPath | When data is sent between the machines, temporary files are stored in the destinationPath location. |
| chunkSize | The chunk size of data sent between the machines. Default: 4194304 bytes. |
| communication protocol | When the mirroring application is installed, it uses basicHttpBinding by default when communicating between the machines. To change this, change the bindings in the configuration files for both the source and the target application, see About WCF and Bindings on MSDN. |
| sourceConnectionStringName | The mirroring provider uses the connection string from the connectionStrings section, by default. |
| destinationConnectionStringName | The mirroring provider uses the connection string from the connectionStrings section, by default. |
| offlineLoggingEnabled | Indicates whether offline logging is enable. Default is disabled (false); enable by setting to true. |
| offlineLogPath | Indicates the path to the offline log. Default is C:\Windows\Temp\episerver\cms6\mirroring\monitoring\. |
<episerverMirroring>
    <mirroringTransfer defaultProvider="myMirroringProvider">
       <providers>
          <add
                 defaultEndpointName="mirroringTargetEndPoint"
                 destinationPath="c:\temp\mirroring\"
                 chunkSize="4194304"
                 name="MirroringTransferServer"
                 type="EPiServer.MirroringService.MirroringTransferProtocol.WCF.MirroringTransferClient,EPiServer.Enterprise"
                 username="XXXX"
                 password=""
                 domain="ep" />
          <add
                 name="myMirroringProvider"
                 type="jobe.MirroringProvider, XXXX.Providers" />
       </providers>
    </mirroringTransfer>
  <mirroringMonitoring offlineLoggningEnabled="true" offlinelogPath="Path to offline log"/>
</episerverMirroring>The Deployment Center installs the mirroring application as an application under the chosen Episerver CMS site. To change the mirroring application to a separate site:
Open up IIS and delete the mirroring application under the source and target sites. After the application is deleted, create a new site and set its root folder to the Mirroring folder that was created as a sub-folder to the source/target site’s root folder.
Note: This document does not contain information about how to use WCF and basicHttpBinding on another port than 80. For details about configuring namespace reservations using a port other than 80 for WCF application hosted in IIS, see Microsoft MSDN.
<endpoint address="http://site1Mirroring/MirroringSourceServer.svc" name="mirroringSourceEndpoint"...
<endpoint address="http://site1Mirroring/MirroringTransferServer.svc" name="mirroringTransferEndpoint"...
Set sourceConnectionStringName and destinationConnectionStringName attributes on the provider to make the mirroring service provider act both as source and target.
<connectionStrings>
    <add
        name= "sourceDB"
        connectionString="" />
    <add
        name= "destinationDB"
        connectionString="" />
</connectionStrings><episerverMirroring>
<mirroringTransfer defaultProvider="MirroringTransferServer">
<providers>
<add
....
sourceConnectionStringName="sourceDB" />
destinationConnectionStringName="destinationDB" />
</providers>
</mirroringTransfer>
<mirroringMonitoring offlineLoggningEnabled="true" offlineLogPath="Path to offline log"/>
</episerverMirroring>Synchronize the bin folders both under the site root folder and mirroring service bin folder. When assemblies in the site bin folder and mirroring service bin folder are not same, the following error appears during Check System:
System.Exception: Value cannot be null.
 Parameter name: type ()
You should have both bin folders synchronized with each other, because the Mirroring Service runs as a separate application and has its own application pool. When you add any custom code/property/module under the source site, copy the affected assembly to the Mirroring Service bin folder also. If you installed mirroring service on both source and destination sites, then Site and Mirroring Service must have the same assemblies under the bin folders.
Last updated: Sep 21, 2015