Installation instructions
This is the download and installation instructions for creating an MVC-based (empty or with sample templates) development project for Episerver Commerce. The MVC package works with Commerce 7.5 and higher versions.
Before you start, refer to the system requirements to ensure that you have the proper setup for your website and development environment.
Installing EPiServer Commerce with CMS
- Start by downloading and executing the Episerver 7.5 Commerce installation package, if not already done. Select "Install Commerce" and "Install Commerce Sample", accept the terms and click OK. This will install the latest versions of CMS and Commerce to the Episerver Deployment Center. If you did already download and install Commerce with sample site, you can go directly to the next step.
- Open Deployment Center and select "Install site and SQL Server database".
- Go through the installation steps 1-3 for CMS, refer to the installation instructions if you need to change any suggested settings.
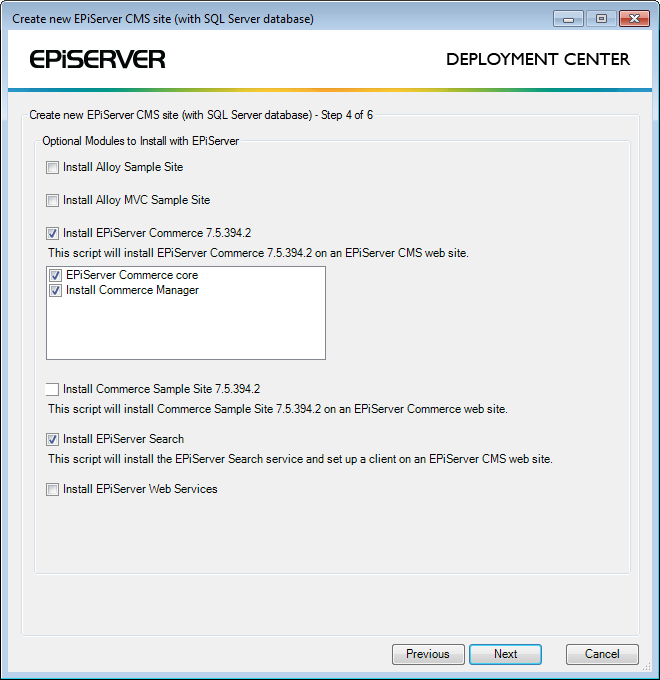
- In step 4, select "Install Episerver Commerce...", and select the options "Episerver Commerce core" and "Install Commerce Manager". Click Next to continue.
- Complete the installation steps 5-6 using the settings as suggested by the system, add a license file when requested.
- The installation will continue with the Commerce parts. In step 1 select "Create Commerce database" and continue with the installation, refer to the installation instructions if you need to change any suggested settings.
- Complete the installation parts steps 2-5, refer to the installation instructions if you need to change any suggested settings here.
- When the installation has finalized, the site will open in a browser. The site is empty since there are no display templates. Click the link provided to access the Episerver administration interface, and log in with admin/store (the default Commerce administration account).
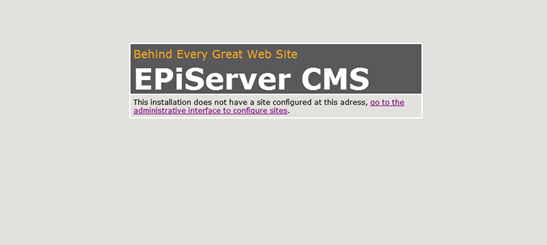
To access Edit view in Episerver, a site with a start page must be defined. Since there are no sites or start pages defined, you will get an error message when trying to access Edit at this point. In the next step you will temporarily define a site with the root page as a start page. - In Admin view, go to Config -> Manage Websites. Define a new site and point the start page to the root page which should be the only page available. You can register the localhost, or the actual computer name, or both.
Note: If you only select localhost there is no way to access the site from outside.
Adding a project for the site in Visual Studio
- Download the MVC sample package for Commerce associated with this page (click Download), and unzip the files. You can also download an empty MVC-based project without sample templates.
- Copy the unzipped files to the wwwroot folder of the website.
- In Visual Studio (run VS as admin), open the sln file.
- Add the nuget package "Microsoft ASP.NET Web Optimization Framework" to the project.
- Go to project properties and modify the IIS Web server settings to point to the URL of your newly installed site.
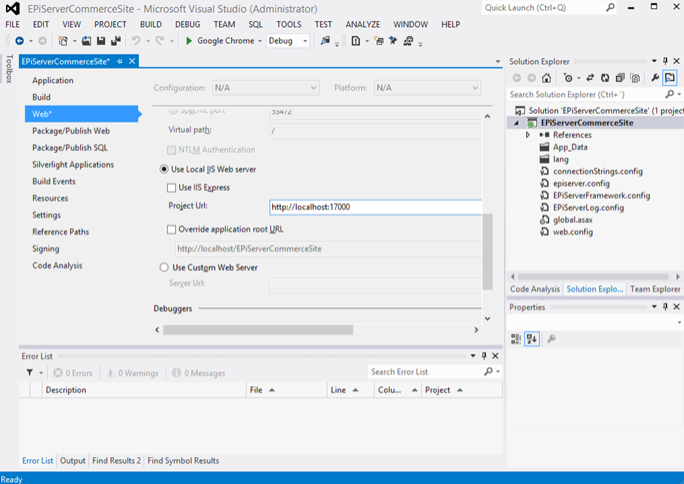
You can verify that the URL is correct by clicking the Create Virtual Directory button. - Compile the site and go to the start page, which will show and expected error, due to a missing start page configuration. go to Admin view and Manage websites, to configure a correct start page.
Additional configuration
Adding MarketID in web.config
- Open web.config.
- Go to the profile section.
- Add the new property MarketId:
<add name="MarketId" type="System.String" allowAnonymous="true" />