This topic describes how to install and use the PayPal payment provider, one of several payment solutions available for Episerver Commerce.
Apps folder
In Episerver Commerce 7.5, the Apps folder is located in the Episerver Commerce Manager Shared Files Folder, typically C:\EPiServer\<YourCommerceManagerSite>\eCommerceFramework\5.3\Shared.
If your Commerce Manager site is updated to the latest version via NuGet, the Apps folder should be located in the wwwroot folder, typically E:\ EPiServer \<YourCommerceManagerSite>\wwwroot\Apps.
Refer to this Apps folder as your corresponding path for the Apps folder mentioned below.
Files in the PayPal payment provider project
The following files are included in the project package:
- PayPalPayment_EN.xml (lang file)
- CanadianOrUSstates.txt (resource file)
- ISOCodes.txt (resource file)
- ConfigurePayment.ascx (and its ascx.cs, ascx.designer.cs file)
- EditTab.ascx (and its ascx.cs, ascx.designer.cs file)
- PaymentMethod.ascx (and its ascx.cs, ascx.designer.cs file)
- PayPal.css
- PayPal.aspx (and its ascx.cs, ascx.designer.cs file)
- PayPalPaymentGateway.cs (main payment gateway business)
- Utilities.cs (contains helper functions)
- PayPalPaymentMetaClass.xml (contains payment meta class)
Deployment
Downloading the PayPal payment provider file package provides you with an EPiServer.Business.Commerce.Payment.PayPal project. The following steps show how to deploy the PayPal Payment Provider to your solution.
- Deploy PaymentMethod.ascx, PayPal.css, ISOCodes.txt, CanadianOrUSstates.txt to the folder ~Commerce SampleSite]\Templates\Sample\Units\CartCheckout\PayPal of your website. Create the PayPal folder if it does not exist, but do not include them in the Episerver Sample Project.
- Deploy the file ConfigurePayment.ascx to the Apps\Order\Payments\Plugins\PayPal. Create the PayPal folder if it does not exist.
- Deploy the file EditTab.ascx to the Apps\Order\Payments\MetaData\PayPal. Create the PayPal folder if it does not exist.
- Deploy the file PayPalPayment_EN.xml to the lang folder of the Commerce Sample site.
- Deploy the file PayPal.aspx, to the folders Commerce SampleSite]/Templates/Sample/Pages/, but do not include them in the Commerce Sample project.
- Open the PayPal project, and make sure you have saved the solution, in order, to install NuGet packages.
- Install PayPalMerchantSDK package via nuget by executing this command in "Package Manager Console": Install-Package PayPalMerchantSDK -version 2.12.117
- Install EPiServer.Commerce.Core package via nuget by executing the following command in "Package Manager Console": Install-Package EPiServer.Commerce.Core (you might want to install the version that your site is using in order to avoid assembly confliction). You do no need to apply any database transform or removing Common Framework components.
- Rebuild the PayPal project, and you have EPiServer.Business.Commerce.Payment.PayPal.dll and PayPal's assemblies PayPalCoreSDK.dll, PayPalMerchantSDK.dll.
- Deploy PayPalCoreSDK.dll, PayPalMerchantSDK.dll and EPiServer.Business.Commerce.Payment.PayPal.dll to the bin folder of your CommerceManagerSite. (for instance C:\EPiServer\Sites\CommerceManager\bin).
- Deploy PayPalCoreSDK.dll, PayPalMerchantSDK.dll,EPiServer.Business.Commerce.Payment.PayPal.dll to the bin folder of your Commerce Sample Site. (for instance C:\EPiServer\Sites\Commerce Sample\bin).
Creating PayPal pages
After deploying the project files, set up a PayPal page.
- Create an Episerver CMS page using the [Commerce] PayPal page type.
- Add a property named PayPalPaymentPage of the type Page to the Home page page type.
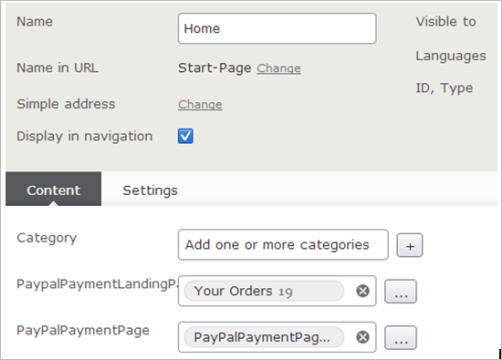
- Edit the PayPalPaymentPage property on the Home page and set the page link of the created page (in the first step) to the property's value.
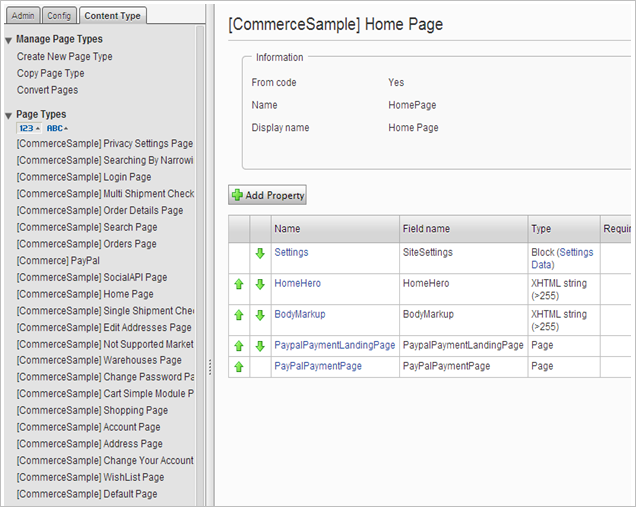
- Add a property named PaypalPaymentLandingPage of the type Page to the Home page page type.
- Edit the PaypalPaymentLandingPage property on the Home page and set the page link of the Home>Self Service>Your Orders to the property's value.
Configuration
After deploying all necessary files, open the Episerver Commerce Manager back-end site and do the following:
- Go to Administration/Order System/Payments/English (United States), the last option is the language in which you chose to make the PayPal payment to be available in.
- Select Create new payment method. The System keyword must be PayPal (the name of the folder created during deployment). Class Name must be EPiServer.Business.Commerce.Payment.PayPal.PayPalPaymentGateway, and Payment Class must be EPiServer.Business.Commerce.Payment.PayPal.Orders.PayPalPayment.
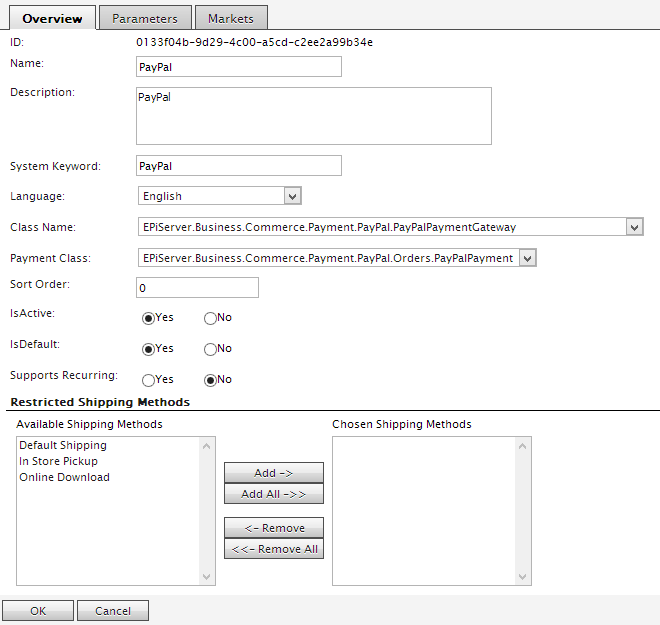
- When you click OK, the new payment method will be saved with a specific ID.
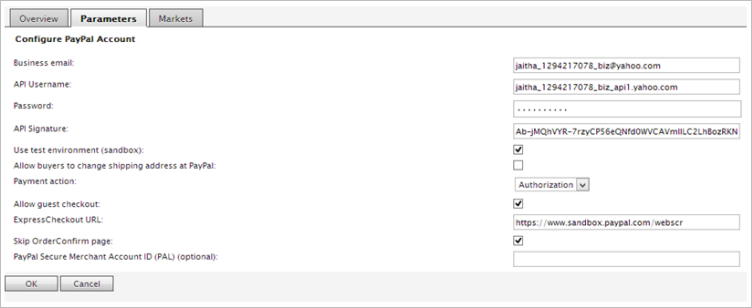
- Open the payment method for editing again, go to the Parameters tab and enter the following:
- Business email. The main email that you registered with PayPal.
- API Username. The API user name PayPal will give you when the use registers to use PayPal’s API calls.
- Password. Your PayPal’s API user password.
- API Signature. Your PayPal’s API signature.
- Use test environment (sandbox). Specify here if this is a testing settings or not (sandbox environment or live environment).
- Allow buyers to change shipping address at PayPal. Defines whether to allow buyers to change their shipping address when reviewing their PayPal payment.
- Payment action. The payment action buyers will perform at PayPal. Default is Authorization where a payment is authorized only, not yet captured. With the Sale option, the payment will be immediately transferred from buyer’s account to merchant’s account.
- Allow guest checkout. Allows buyers who does not have a PayPal account to perform a payment. If allowed, buyers will see a billing page from which they can pay using a credit card without having to login to PayPal. If not allowed, the buyer will see a login page when redirected to PayPal.
- ExpressCheckout URL. The URL to redirect a user to PayPal when the SetExpressCheckout API call is successful. Note that this URL should change according to the Use test environment option.
- Skip Order Confirm page. Lets buyers go directly to PayPal after selecting PayPal as payment method. Otherwise buyers will see an order confirmation page before being redirected to the PayPal. By default the buyers will not see the order confirmation page.
- PayPal Secure Merchant Account ID (PAL) (optional). Used to create the dynamic PayPal mark image on the payment selection page. If nothing is entered here, an API call will be made to PayPal to get it.
- In Commerce Manager, navigate to Administration > Order System > Meta Classes, and click Import MetaData to populate the MetaData import screen. Then select the PayPal\ PayPalPaymentMetaClass.xml file to import.
- Finally, go to the Markets tab and add the expected markets for this payment.
Configuring the PayPal HashKey (optional)
The communication with PayPal uses a private hash key to ensure security in the communication. This private hash key will be used to create secure hash keys, which appends to an accept URL and a cancel URL. The information about accept URL and cancel URL is sent to PayPal using HTTPS, so these keys will not be exposed.
When PayPal redirects a user to those URLs, the keys are used to verify that the request comes from PayPal only, since only PayPal knows about the keys.
You can configure this hash key in the application settings configuration section under the key “PayPalHashKey”.

Using PayPal
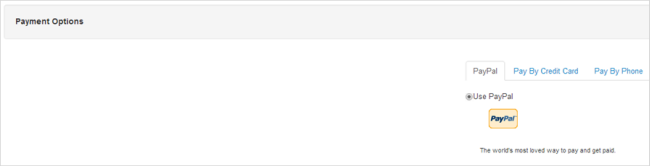
When you have deployed the files and configured the PayPal Payment module on your Episerver Commerce website, you should have a PayPal option in your checkout procedure.
- Select PayPal as payment method on the Payment Options page during check out.
- When you click Place Order on the order confirmation page, you are redirected to PayPal.com to approve the payment.
- You can see the shipping and billing addresses entered in the checkout procedure, during which you can change these addresses.
- When you have finalized the approval process, you are redirected to the “Your Orders” page previously configured.
Note: PayPal.com checks the address (billing and shipping) very carefully. If you use a US address to test, use the correct and complete one with ZIP code, State, and City, otherwise the precheck with PayPal API will fail and you cannot complete the payment.
Last updated: Apr 13, 2017