Installation Instructions - Episerver Commerce 1.0
| Product version: | Episerver Commerce 1.0 |
|---|---|
|
Document last saved: |
Introduction
Installation of Episerver Commerce is done through the Episerver Deployment Center.
This document describes how to install the EPiServer Commerce product. The EPiServer Commerce installation comprises of assemblies, configuration, database setup and various components.
Installing an EPiServer Commerce Sample solution is the quickest way to experience the EPiServer Commerce product and its functionality. After installing EPiServer Commerce and the EPiServer Commerce sample package the Commerce Manager site and EPiServer CMS website will be up and running. In short, the Commerce Manager handles customers, products, marketing etc along will all functionality required to create a complete e-commerce solution and EPiServer CMS website displays the products etc.
Table of Contents
- Package Overview
- Prerequisites
- Installation Steps Overview - Read This!
- Launching Installation Files
- Create an SQL Login (SQL Server Management Studio)
- EPiServer Commerce Installation
- EPiServer Commerce Sample Installation
- Post-installation Configuration
- First Time Login
- Configure Settings
- Test Buying a Product - Sample Catalog and Display Templates Installation
- Manual EPiServer Commerce License Installation
- Configuring DIBS payment system
- Troubleshooting
- Related Information
Package Overview
EPiServer Commerce can be found in the download section - on EPiServer World. Here is an overview of the EPiServer Commerce installation components:
- EPiServer Commerce.msi
This package contains all necessary files to install EPiServer Commerce and core files, this includes PowerShell scripts and assemblies. - EPiServer Commerce Sample.msi
This package contains the sample Commerce Display Templates.
Prerequisites
-
Installation of a EPiServer CMS Version 6 (6.0.530.0) website, see the EPiServer CMS 6 Installation Instructions
-
Administrative rights on the machine
-
See also the System Requirements
Installation Steps Overview - Read This!
Perform the steps in the order below to create an EPiServer Commerce sample installation - follow the steps in the relevant sections in this document.
- Install a EPiServer CMS 6 website with a SQL database (public templates not required) - this is required! See the EPiServer CMS 6 Installation Instructions.
- Launch the EPiServer Commerce Installation and Commerce Sample Files - see the section below.
- Create a SQL login (SQL Server Management Studio) - see the section below.
- Perform all steps in: EPiServer Commerce Installation - see the section below.
- Perform all steps in:EPiServer Commerce Sample Installation - EPiServer Commerce Sample Installation - see the section below.
- Perform all steps in: Sample Catalog and Display Templates Installation - Installing the sample display templates in Commerce Manager - see the section below.
Create a SQL Login (SQL Server Management Studio)
Here we create a master login which you will be able to use to access the EPiServer Commerce site, the Commerce Manager site and the EPiServer OnlineCenter.
Complete the following steps to create a SQL Server login that uses SQL Server Authentication (SQL Server Management Studio):
-
In SQL Server Management Studio, open Object Explorer and expand the folder of the server instance in which to create the new login.
-
Right-click the Security folder, point to New, and then click Login.
-
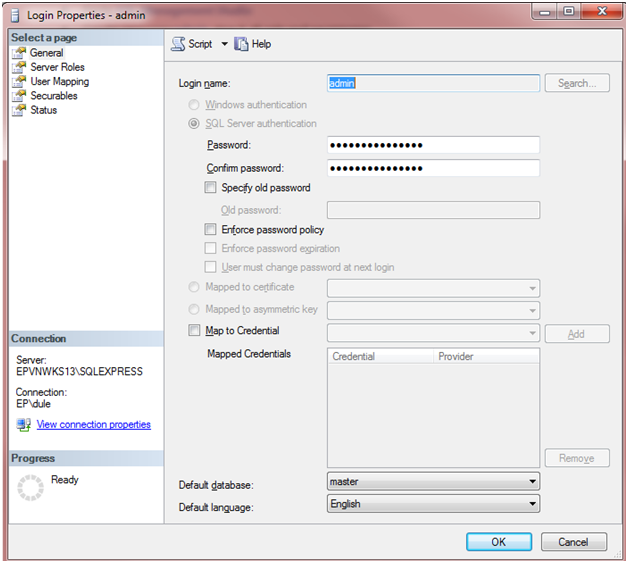
On the General page,
- Select SQL Server Authentication or you can use Windows Authentication (ensure your windows account has full access rights to the database server).
- Enter a name for the new login (admin for example), give the user all roles and permissions.
- Password = store for example (if using SQL Server Authentication remove the Enforce password policy checkbox)
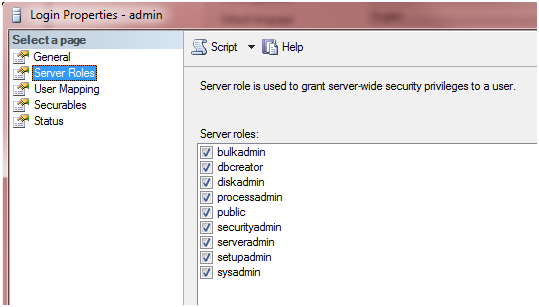
- server roles: public, setupadmin, sysadmin (if possible add all server roles)
- give the user admin settings in User Mapping to master database, check public and db_owner).
-
Click OK.
Launching Installation Files
Download EPiServer Commerce. The steps to launch EPiServer Commerce and sample files into the EPiServer Deployment Center are described in the following.
EPiServer Commerce:
-
Launch the EPiServer Commerce.msi. Click Next.
-
Click Install.
-
Wait until the process is finalized, then click Finish.
EPiServer Commerce sample files:
-
Launch EPiServer Commerce Sample.msi. Click Next.
-
Click Install.
-
Wait until the process is finalized, then click Finish
EPiServer Commerce Installation
EPiServer Commerce consists of at least two websites: an EPiServer CMS 6 website and a Commerce Manager website. An EPiServer CMS 6 website must be installed before completing the following steps. Peform the following steps to install EPiServer Commerce:
- Download and install the EPiServer Commerce.msi file - see the Launch EPiServer Commerce msi file section.
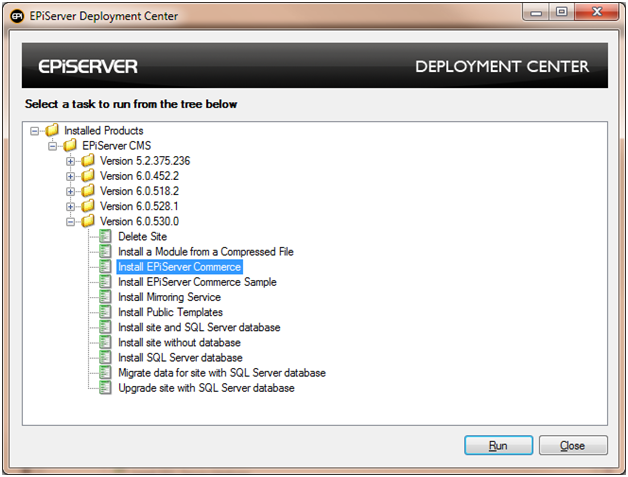
- Start the EPiServer Deployment Center.
- Expand the EPiServer CMS version (6.0.530.0) and select Install EPiServer Commerce and then click Run.
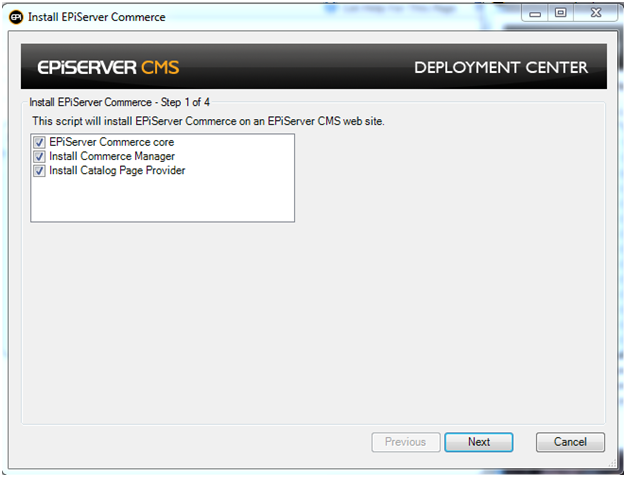
- • Make sure the EPiServer Commerce core checkbox is selected. Click Next.
• Check Install Commerce Manager if you want to install the Commerce management console from our partner MediaChase
• Check Install Catalog Page Provider if you want to install the Catalog Page Provider.
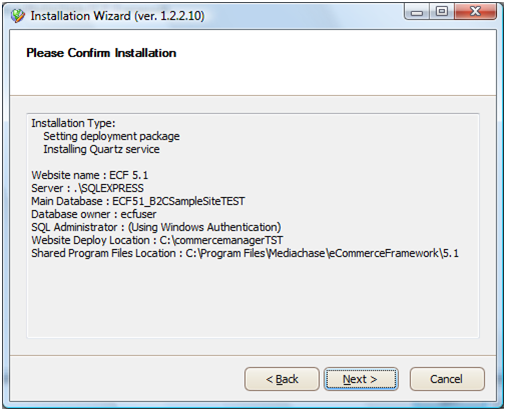
- EPiServer Commerce Database Configuration (Commerce Manager):
You need to have created an SQL Admin login, refer to the steps in the Create an SQL Login section. Use this login for the SQL Admin login credentials here (SQL Admin Username and Password).
You must provide account information for the database owner and you must also provide a SQL Admin user account.
- Please note there are options to use Windows Authentication for the database owner and admin. These options are currently not working. Use SQL Authentication instead.
- Please note use different SQL credentials for the Database Owner and the SQL Admin Username.
- Please note when entering Server Name enter the machine name and not “.” Or “.\SQLEXPRESS”. Select the Browse button and select the Server Name.
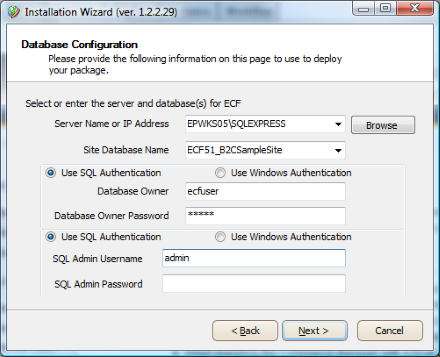
- You are required to create a new site for the Commerce Manager. Click on New Site.
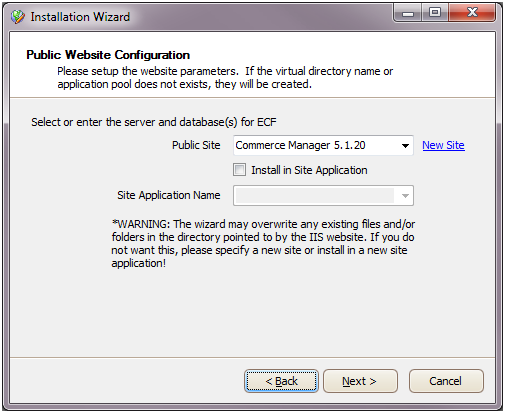
Enter details for the Commerce Manager website.
- Insert the desired port number.
- Remember to map the machine IP address to the commerce manager host name/ Host Header.
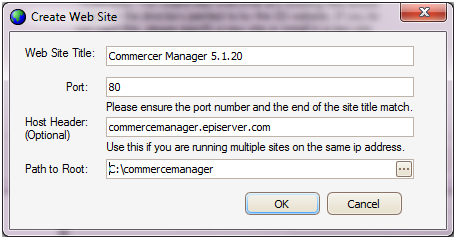
Click OK and then click Next.
- Quartz Service is installed to enable automated search indexing and add a location for configuring the Commerce Manager shared program files.
Do not select Install Sample Site and Catalogs - this is option is not applicable for EPiServer Commerce - EPiServer Commerce Sample package installation will be covered in the section below.
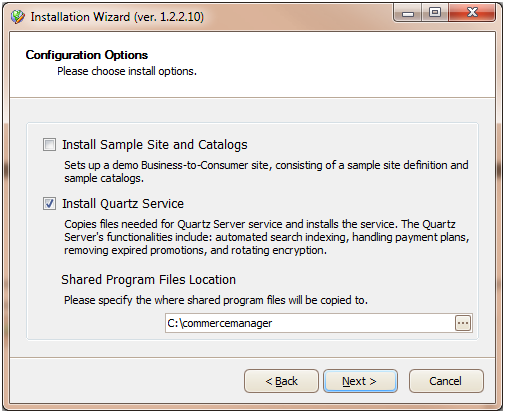
- Click Next.
- Wait until the components configuration is completed.
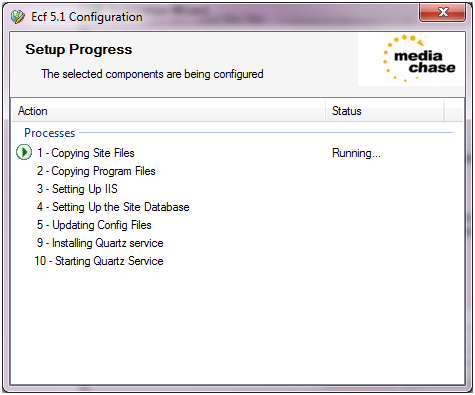
On completion click Finished.
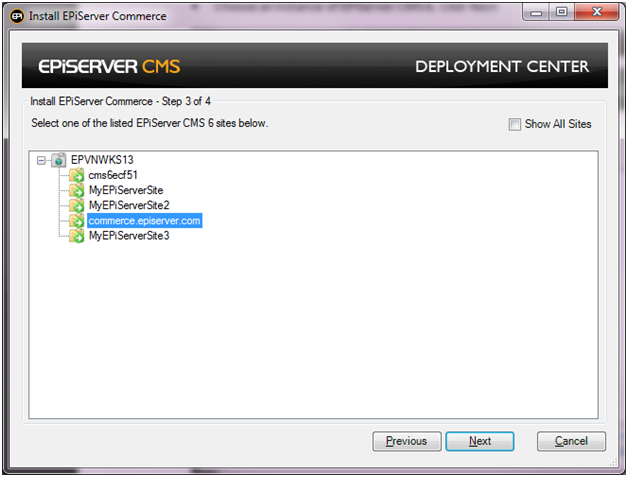
- Click Next.
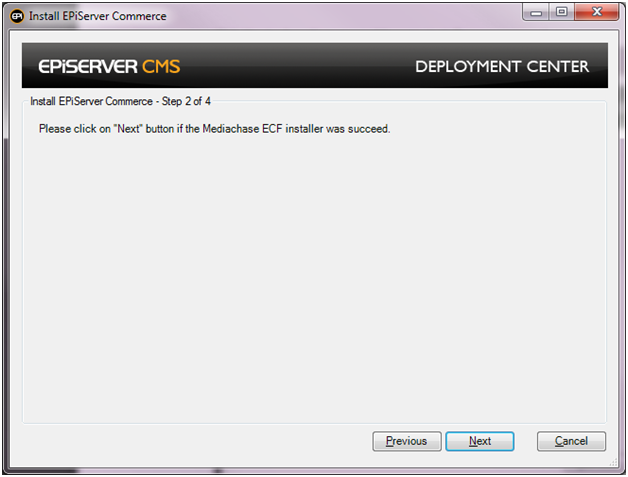
- Choose an instance of a EPiServer CMS 6 website from the list and click Next.
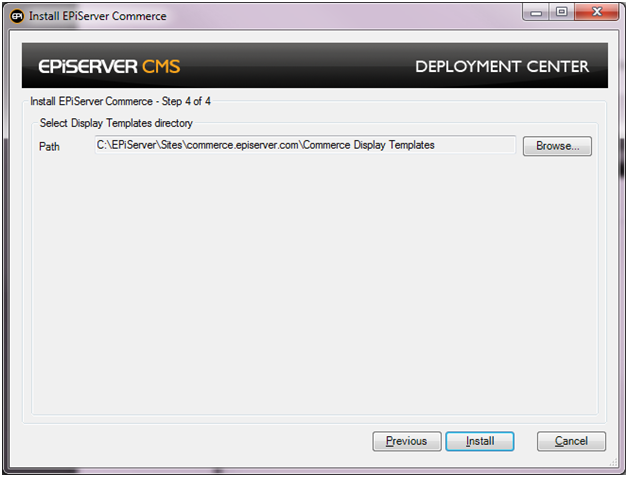
- Select a Display Templates directory (contains all display templates for EPiServer Commerce).
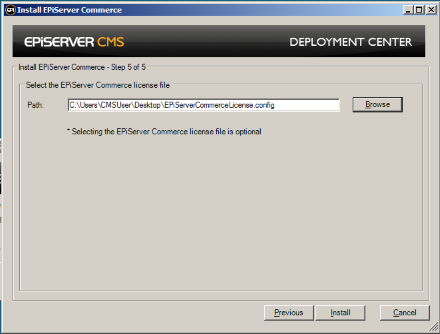
- Click Browse and locate the EPiServer Commerce License to be installed (EPiServerCommerceLicense.config) and then click Install.
Please note in order for the EPIServer Commerce sample package to work correctly you are required to install a license.
- When installation is completed, click Close.
Post-installation Configuration
After installation there is some post-installation configuration for the Commerce Manager regarding to access rights for the import/export function of Commerce Manager.
- Go to your Commerce Manager site file structure, then “App_Data” folder
- Right click on “ImportExport” folder and select “Properties”
- Select “Security” tab and make sure IUSR and IIS_IUSRS users have necessary permission
Please note you may need to configure the Commerce Manager website host header in the host file on the machine.
EPiServer Commerce Sample Installation
Peform the following steps to install the EPiServer Commerce Sample package:
- Download and install the EPiServer Commerce Sample.msi file - see the Launch Installation Files section for further information.
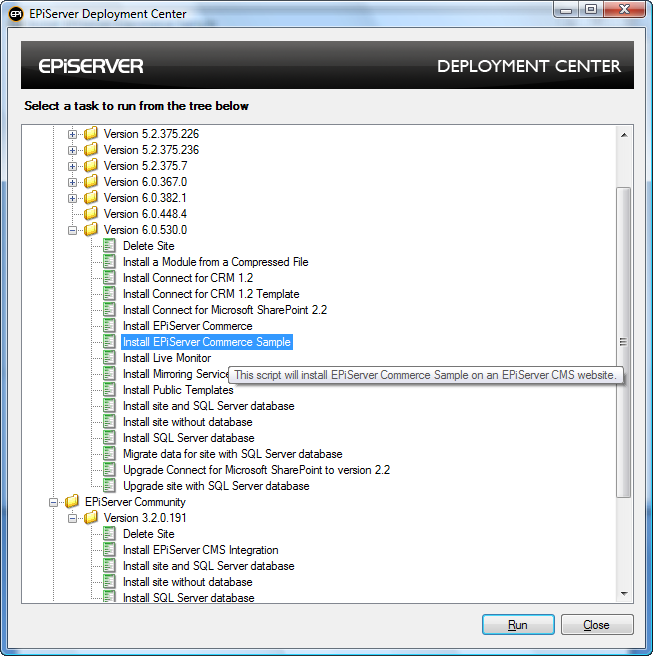
- Start the EPiServer Deployment Center.
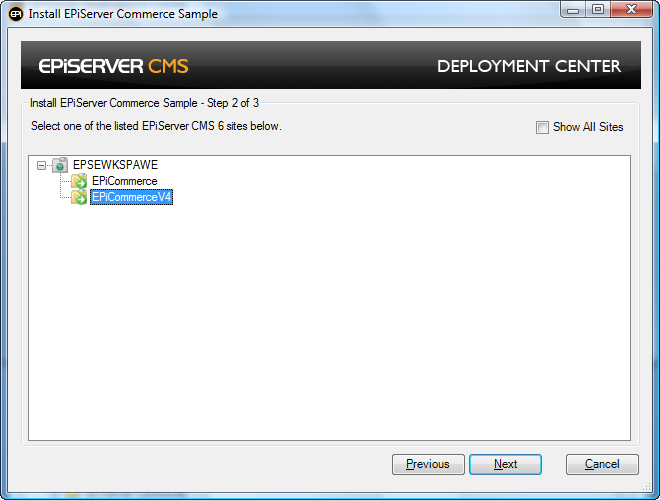
- Expand the EPiServer CMS version (6.0.530.0) and select Install EPiServer Commerce Sample and then click Run.
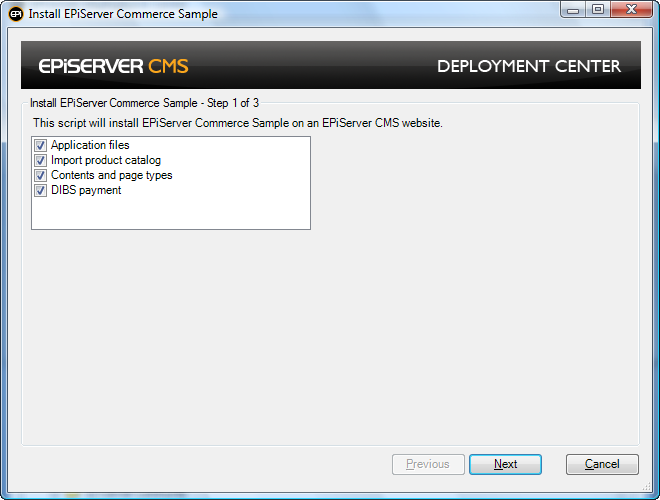
- Select features you want to install and then click Next:
- Application files: Install required application files for EPiServer Commerce Sample. This is the required feature and cannot be uncheck.
- Import product catalog: Import Commerce sample product catalog
- Contents and page types: Import sample page types, pages and contents.
- DIBS payment: Installs DIBS payment method (post installation configuration required - see Configuring DIBS Payment System section).
- Select the target site that you want to install EPiServer Commerce Sample on. The website must have EPiServer Commerce core installed - see the Install EPiServer Commerce Installation section in this document.
- The installer will import the sample product catalog if the “Import Product catalog” feature was selected.
- Click Install to continue the installation.
- Wait until the installation is completed, and then click Close.
First Time Login
When you install EPiServer Commerce, you are provided with a default account with the following credentials: Username - admin; Password - store (it is highly recommended that you change this password when implementing your site). This Admin Account is given full privileges, meaning it is full access to all systems and all elements within each sub-system.
Do the following to access the EPiServer Commerce site for the first time:
- Browse to the EPiServer Commerce site created and click on the Log in link

- Enter the login details: Username - admin; Password - store.
- Right-click and the EPiServer context menu will appear. Select the Dashboard option.
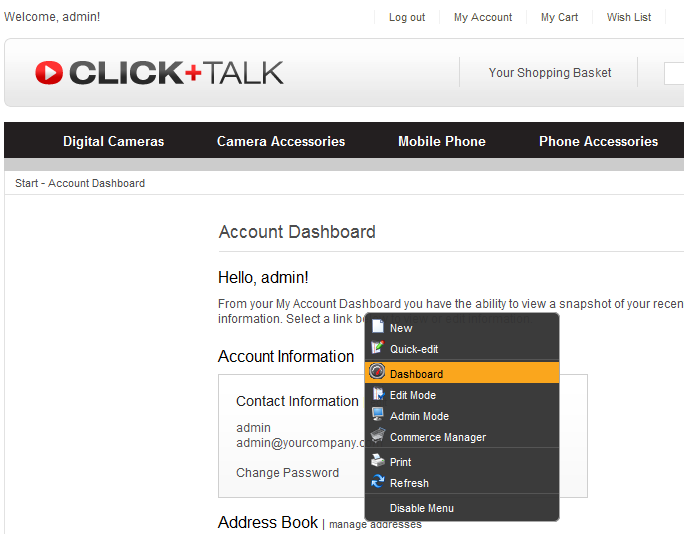
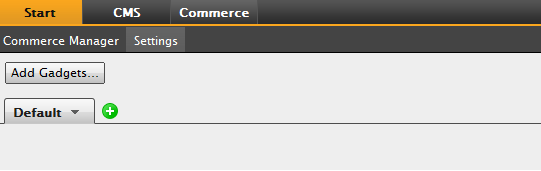
- From the Dashboard's top menu select the Commerce option and then select Settings.
- Now carry out the Configure Settings steps below.
Configure Settings
-
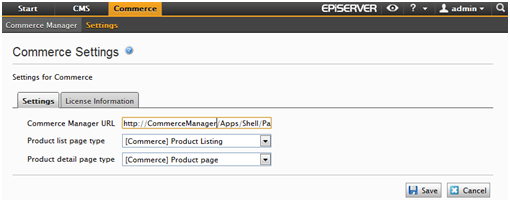
Navigate to the Settings tab Commerce Settings in Commerce/Settings, enter the URL of the Commerce Manager
(for example http://CommerceManager/Apps/Shell/Pages/default.aspx) then click on Save button. - From the Product list page type drop-down list select [Commerce] Product Listing. From the Product detail page type drop-down list select [Commerce] Product page.
-
Click Save.
-
Click on the Commerce Manager tab and proceed to the Commerce Manager.
Test Buying a Product - Go to Checkout
In the setup of the EPiServer Commerce sample package after clicking on the Place Order button, you will not get directed to the "Thank you for your Order" page by default.
Do the following:
- Configure the solution to send confirmation email, see the document - How to configure smtp email configuration in Commerce system - in the EPiServer Commerce Developer Guide.
- Alternatively, comment out the line of code in the sample package which calls the send email notification function - in the control CheckoutWizardModule.ascx the line:SendEmails(po, email);
Further Configuration
After installation of the EPiServer Commerce sample, there is some post-installation configuration which should be completed regarding to DIBS Payment sample and configuring SMTP for sending email. Please refer to the following documents in the EPiServer Commerce Developer Guide:
- How to configure the DIBS payment in Commerce system
- How to configure smtp email configuration in Commerce system
The product catalog should already be indexed by default after installing the sample package. If you choose to import sample product catalog, you have to build the search index for product catalogs and configure the display template - refer to the section Sample Catalog and Display Templates Installation.
Sample Catalog and Display Templates Installation
See the steps below to install the sample display templates:
-
In Commerce Manager, select Administration->System Settings/Sites/Site Templates/English (United States).

-
Create the following display templates (click on New):
a. Digital Camera
i. Name: DigitalCameraTemplate
ii. Friendly Name: Digital Camera
iii. Type: entry
iv. Path: ~/Templates/Everything/BusinessControls/CatalogBrowseControls/EntryTemplates/DigitalCameraTemplate.ascx
b. Node Info Template
i. Name: NodeInfoTemplate
ii. Friendly Name: Node Info Template
iii. Type: node
iv. Path: ~/Templates/Everything/BusinessControls/CatalogBrowseControls/NodeTemplates/NodeInfo.ascx
c. Entries Template
i. Name: EntriesTemplate
ii. Friendly Name: EntriesTemplate
iii. Type: node
iv. Path: ~/Templates/Everything/BusinessControls/CatalogBrowseControls/NodeTemplates/EntriesFiltered.ascx
Import Catalog
Please note that the sample catalog is part of the EPiServer Commerce Sample installation which is installed through the EPiServer Deployment Center and the following steps should not be necessary if installation of the EPiServer Commerce Sample was successful.
In needed, do the following to import the sample catalog::
-
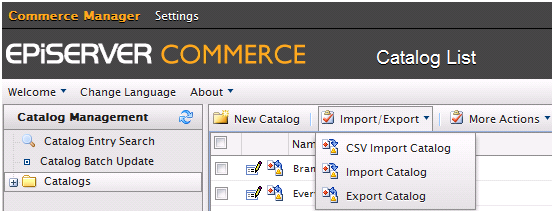
In Commerce Manager, select Catalog Management and Catalogs.
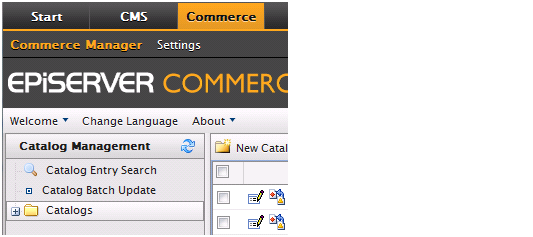
-
Click on Import/Export and then Import Catalog, this would take you to the “Import Catalog” screen.
-
Highlight CatalogExport-BG2C-Everything.zip and click on Start Import button.
-
When complete, click Close Window.
-
Highlight CatalogExport-B2C-Brands.zip and click Start Import button.
Indexing a Catalog
After importing a catalog, you are required to index the catalog in order for to it work correctly, see the steps below.
- In the Commerce Manager, select Administration->System Settings->Search Index:
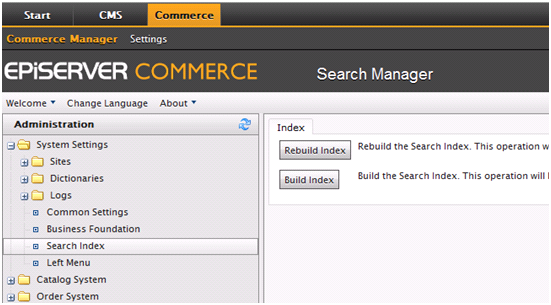
- Select Rebuild Index and wait until the Index has built.
Manual EPiServer Commerce License Installation
If EPiServer Commerce License installation was not performed during EPiServer Commerce installation it can also be performed manually. On completion of EPiServer Commerce installation the Commerce Manager web application will be installed (see the EPiServer Commerce Installation section), though you will not be able access and use the Commerce Manager until the license have been installed correctly. The following license is required:
-
EPiServerCommerceLicense.config
In order to install the EPiServer Commerce license manually, perform the following steps:
-
Copy the EPiServerCommerceLicense.config to the root folder of both the EPiServer (CMS) website and the Commerce Manager website (for example C:\EPiServer\Sites\EPiCommerce and C:\commercemanager).
-
The license should then be installed, to proceed to the Commerce Manager you can click on Commerce Manager tab.
Commerce Manager License
The Commerce Manager license is not the same as the EPiServer Commerce License - (EPiServerCommerceLicense.config) which is installed during the initial installation of EPiServer Commerce as described in this document. The Commerce Manager license will be installed by default during installation of the EPiServer Commerce core package. Updating the Commerce Manager license should only be performed after consulting with EPiServer. See the document Updating Commerce Mananger License for further information.
Configuring DIBS Payment System
See the article How to Configure the DIBS Payment System located in the EPiServer Commerce Developer Guide (EPiServer Commerce Sample package section). For further information regarding the DIBS integration see the the article DIBS Integration Notes located in the EPiServer Commerce Developer Guide.
Troubleshooting
- If you encounter the error message "The license file "C:\commercemanager\EPiServerCommerceLicense.config" does not exist message", then move the EPiServer Commerce License to the root of the commerce manager website.
- Logging wil have an affect on the Commerce Manager website - one option is to change the level value of logging in the log4net.config file.
- In the default setup of the EPiServer Commerce sample package after clicking on the Place Order button and you will not get directed to the "Thank you for your Order" page. Do the following:
- Configure the solution to send confirmation email, see the document - How to configure smtp email configuration in Commerce system - in the EPiServer Commerce Developer Guide.
- Or even comment out the line of code in the sample package which calls the send email notification function - in the control CheckoutWizardModule.ascx SendEmails(po, email);.
Related Information
For information about using the EPiServer Commerce Sample Package see the EPiServer Commerce User Guide. For developer information see the EPiServer Commerce Developer Guide.