Order management classes
With EPiServer Commerce, there are several ways of creating an order through the order system API. The main steps in the creation of an order are described in this document, in order to provide an understanding of the underlying mechanisms for order management.
Classes referred to here are available in the Mediachase.Commerce.Orders namespace.
Key classes
CartHelper
The CartHelper class acts as a common helper class for management of carts and orders. Using the CartHelper class is most often sufficient for many of the straightforward order placement scenarios. One of the advantages of the CartHelper class is that all required objects are automatically created in the background.
Example: adding an entry to a default cart via CartHelper
Entry MyEntry = CatalogContext.Current.GetCatalogEntry(entryCode, new CatalogEntryResponseGroup(CatalogEntryResponseGroup.ResponseGroup.CatalogEntryFull));
        CartHelper MyHelper = new CartHelper(Cart.DefaultName);MyHelper.AddEntry(MyEntry);
The only additional step required is the transformation of the cart to a PurchaseOrder.
Cart and OrderForm
Working with the Cart class and OrderForm class directly, provides increased options and added flexibility compared to using CartHelper classes. In this example, we will mainly use the OrderForm, Cart, PurchaseOrder, LineItem and related classes.
Creating an order
The following example shows how to create an empty PurchaseOrder and store it in the database. The Cart class is used and the SaveAsPurchaseOrder() method transforms the cart to a PurchaseOrder.
Example: creating an empty order
Cart TheCart = OrderContext.Current.GetCart("MinimalOrder",CustomerContext.Current.CurrentContactId);
            PurchaseOrder purchaseOrder = TheCart.SaveAsPurchaseOrder();
            purchaseOrder.AcceptChanges();
Entities like OrderForms, LineItems, shipments and payments are still not in the order. The order will be incomplete and cannot be properly loaded. While using CartHelper class takes care of this automatically, there are also other ways of working with the order system.
EPiServer Commerce can utilize several OrderForms in a single order. Most often, a single Order Form will be sufficient, but the platform supports a one-to-many relation for most of the order system entities. The order API is therefore prepared for encountering several OrderForm instances in an order.
The above code creates a more or less empty OrderGroup database entry, with a name and a customer reference. The status is set to InProgress which is correct, however more steps must be taken for the order to be properly processed.
Adding OrderForm and shipment
Next we will add an OrderForm and the first Shipping so that LineItems can also be added.
Adding an order form
The following example opens up the order again and adds an OrderForm. The integer 114 is the OrderGroup primary key. An OrderGroup is like a bucket for a cart or an order.
Example: adding an order form
PurchaseOrder purchaseOrder = OrderContext.Current.GetPurchaseOrderById(114);
            OrderForm orderForm = new OrderForm();
            purchaseOrder.OrderForms.Add(orderForm);
            purchaseOrder.AcceptChanges();
As previously stated, there can be several OrderForms in an OrderGroup, and most often a single OrderForm is not sufficient. In this case, a customization is required.
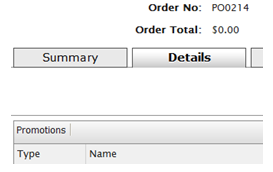
The image shows that an order can be accessed by the UI after adding an OrderForm. Under the Details tab, there is no way of adding LineItems since the order process is closely tied to shipments. However, from an API and database point of view, there are no restrictions of any kind.
Adding a shipment
Example: adding a shipment to the order
Shipment TheShipment = new Shipment();
            OrderForm orderForm = purchaseOrder.OrderForms[0];
            ShippingMethodDto.ShippingMethodRow shippingMethodRow = null;
            ShippingMethodDto allUsShipping = ShippingManager.GetShippingMethods("en-us");
            foreach (ShippingMethodDto.ShippingMethodRow shipRow in allUsShipping.ShippingMethod)
            {
            if (shipRow.DisplayName == "Ground Shipping")
            {
            shippingMethodRow = shipRow;
            }
            }
            TheShipment.ShippingMethodId = shippingMethodRow.ShippingMethodId;
            TheShipment.ShippingMethodName = shippingMethodRow.DisplayName;
            TheShipment.ShippingAddressId=
            CustomerContext.Current.CurrentContact.PreferredShippingAddress.Name
            TheShipment.ShipmentTotal = shippingMethodRow.BasePrice;
            TheShipment.SetParent(orderForm);TheShipment.Status = OrderShipmentStatus.AwaitingInventory.ToString();

            orderForm.Shipments.Add(TheShipment);
            purchaseOrder.AcceptChanges();
Now LineItems can also be added to the order from the user interface.
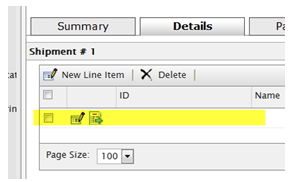
Under the Details tab we can add LineItems to the order. However if the line is opened for editing, an exception such as this is thrown: "Exception Details: System.NullReferenceException" (there is nothing to edit). LineItems can be added via the UI and when this is done, the line gets populated with values.
Adding line items to the order
LineItems can easily be added by the CartHelper (cart property) as shown above using the method AddEntry(<Entry>). When adding the entry by CartHelper, everything else that is required is done in the background, but as we in this case use a PurchaseOrder and not a Cart, this option is not available.
Extending the order schema
To the lineitem class (LineItemEx) in MetaDataPlus, a custom field is added (LineItemExtraInfo) as a plain string field. This is done to be able to differentiate properties between lines in an order, although it is the same SKU (not very commonly used). This option is not available if the CartHelper option is used.
Example: adding line items to an order
// Load what is needed
            PurchaseOrder purchaseOrder = OrderContext.Current.GetPurchaseOrderById(114);
            OrderForm orderForm = purchaseOrder.OrderForms[0];
            Shipment orderFormShipment = orderForm.Shipments[0];

            // Get the Entry
            Entry myEntry = CatalogContext.Current.GetCatalogEntry("049383208344",
            new CatalogEntryResponseGroup
            (CatalogEntryResponseGroup.ResponseGroup.CatalogEntryFull));
            Price price = StoreHelper.GetDiscountPrice(myEntry);

            // First LineItem
            LineItem MyLineItem = new LineItem();
            MyLineItem.DisplayName = myEntry.Name;
            MyLineItem.CatalogEntryId = myEntry.ID;
            MyLineItem.Quantity = 1;
            MyLineItem.PlacedPrice = price.Amount;

            // Second LineItem
            LineItem MyOtherLineItem = new LineItem();
            MyOtherLineItem.CatalogEntryId = myEntry.ID;
            MyOtherLineItem.DisplayName = myEntry.Name;
            MyOtherLineItem.Quantity = 1;
            MyOtherLineItem.PlacedPrice = price.Amount;

            orderForm.LineItems.Add(MyLineItem);
            // To have two lineItems for the same SKU, set the bool LineItemRollup (second arg.) to false
            orderForm.LineItems.Add(MyOtherLineItem, false);
            // Set it true and you will have the count of 2, for one single LineItem

            // The added custom MetaField (class LineItemEx) filled up
            orderForm.LineItems[0]["LineItemExtraInfo"] = "Item 1, nothing special";
            orderForm.LineItems[1]["LineItemExtraInfo"] = "Item 2, very special";

            // The following lines are needed to make the LineItems display
            // The shipping is closely tied to UI, but not related in such a way in the API
            PurchaseOrderManager.AddLineItemToShipment(purchaseOrder, orderForm.LineItems
            [0].LineItemId, orderFormShipment, 1);
            PurchaseOrderManager.AddLineItemToShipment(purchaseOrder, orderForm.LineItems
            [1].LineItemId, orderFormShipment, 1);

            purchaseOrder.OrderForms[0].Shipments.AcceptChanges();
            orderForm.AcceptChanges();
You can of course add LineItems to an order without adding them to a shipment since often orders are subject to change and are not immediately executed.
Adding payments
When the basic purchase order is created, the next step is to add payment and shipment information. Exactly how this is done varies greatly depending on the particular site and integrations with other systems.
Payments
Payment can be executed in many ways and in this example some generic code is used to associate a payment with the order previously created.
Example: adding a payment
PurchaseOrder purchaseOrder = OrderContext.Current.GetPurchaseOrderById(114);
            OrderForm orderForm = purchaseOrder.OrderForms[0];

            // using only one here
            Payment ThePayment = null; // This is one is abstract, not an instantiable "PaymentMethod"
            PaymentMethodDto paymentMethodDto = PaymentManager.GetPaymentMethodBySystemName
            ("Generic", "en-us");
            Decimal amount = 0M;

            foreach (LineItem l in orderForm.LineItems)
            {
            amount += l.PlacedPrice;
            }

            OtherPayment otherPayment = new OtherPayment(); // the "real" payment-Type in
            MetaDataPlus
            ThePayment = (Payment)otherPayment;
            ThePayment.BillingAddressId =
            CustomerContext.Current.CurrentContact.PreferredBillingAddressId.ToString();
            ThePayment.PaymentMethodName = paymentMethodDto.PaymentMethod[0].Name;
            ThePayment.PaymentMethodId = paymentMethodDto.PaymentMethod[0].PaymentMethodId;
            ThePayment.Amount = amount;
            ThePayment.TransactionType = TransactionType.Sale.ToString();
            ThePayment.Status = PaymentStatus.Pending.ToString();
            ThePayment.SetParent(orderForm);
            ThePayment.AcceptChanges();

            orderForm.Payments.Add(ThePayment);
            orderForm.AcceptChanges();
Split shipments
As EPiServer Commerce has a one-to-many relation between most objects in the Order subsystem, LineItems of an order shipment can be split to a new shipment introduced in the order. This displays a message informing that overall totals do not match if a payment already has been created and managed in the UI. When an additional shipment is added, an extra fee has to be paid. The order processing workflows detect that the payments do not match the total amount.
Example: splitting shipments
Shipment existingShipment = purchaseOrder.OrderForms[0].Shipments[0];
            //single OrderFormShipment newShipment = purchaseOrder.OrderForms[0].Shipments.AddNew();

            PurchaseOrderManager.MoveLineItemToShipment(purchaseOrder
            , purchaseOrder.OrderForms[0].LineItems[1].LineItemId
            , existingShipment
            , newShipment
            , 1);

            existingShipment.AcceptChanges();
            newShipment.AcceptChanges();
Split payments
Split payments are supported. Add the payments in the standard way and keep track of totals if payments are added by the API, as these properties are read.
Address information
The Order Management subsystem relies on MetaDataPlus as the meta data engine and for database storage. On the other hand, the Customer Management subsystem relies on Business Foundation for meta data, storage and definitions. This might lead to differences between the class OrderAddress in MetaDataPlus and the class Address in Business Foundation. The latter has a many-to-one relation in the Contact class (a customer) but no direct relation or link to MetaDataPlus and OrderAddress. Depending on how the platform is used, order addresses can be useful.
A method exists at the StoreHelper class (ConvertToOrderAddress) to assist in the transformation of a customer address to an OrderAddress.
Key classes
- OrderAddresses in a PurchaseOrder belongs to the OrderGroup and are contained in the OrderAddressCollection.
- The public class OrderAddress inherits OrderStorageBase, that in turn inherit the public abstract class OrderStorageBase, which in turn inherits the public abstract class MetaStorageBase. The class MetaStorageBase inherits the public class MetaObject in the library Mediachase.MetaDataPlus.dll.
- The definition of an OrderAddress is managed in MetaDataPlus (Administration subsystem) at the OrderGroupAddressEx class definition of structure.
- OrderAddresses are separated from the address for a customer where Business Foundation is used to define address structure.The public class CustomerAddress inherits AddressEntity and is the set of properties of a customer address.
- The public class AddressEntity inherits EntityObject in the namespace Mediachase.BusinessFoundation.Data.Business.
- There is also a public class Address, but this is related to payments in the namespace Mediachase.Commerce.Plugins.Payment.Authorize.
- The StoreHelper.ConvertToOrderAddress method is used for the transformation.
Example: order addresses and display
OrderAddress orderShipping = StoreHelper.ConvertToOrderAddress(
                CustomerContext.Current.CurrentContact.PreferredShippingAddress);
                purchaseOrder.OrderAddresses.Add(orderShipping);

                OrderAddress orderBilling = StoreHelper.ConvertToOrderAddress(
                CustomerContext.Current.CurrentContact.PreferredBillingAddress);
                purchaseOrder.OrderAddresses.Add(orderBilling);

                purchaseOrder.OrderAddresses.AcceptChanges();
                // This is an "extra field" in the OrderGroup table (UI related)
                purchaseOrder.CustomerName = CustomerContext.Current.CurrentContactName;

                // Name of the orderform
                purchaseOrder.OrderForms[0].Name = "FirstOrderForm";

                // Displaying the right billing address
                purchaseOrder.OrderForms[0].BillingAddressId = orderBilling.Name;

                purchaseOrder.OrderForms.AcceptChanges();
purchaseOrder.AcceptChanges();Last updated: Mar 31, 2014