
Get started with Abandoned Basket e-mails
Abandoned basket e-mails is a widely used concept within commerce and builds on the concept that visitors use their basket as a "reminder". A lot of visitors put products in their basket since they're not ready for the purchase, they want to do more research, they don't have time to do the checkout, information is missing etc. As a commerce website, we can utilize this opportunity of a visitor showing a high interest for a product (by adding it to the basket) to generate more sales.
In the following post, I will show you hands-on how you set-up an abandoned basket scenario with Episerver Personalization and Episerver Campaign.
Before we start digging into the details, let's have a look at the steps we need to do (i assume that Episerver Personalization tracking is already implemented on the website):
- Request a new recipient list
- Create an abandoned basket campaign in the Personalization Portal
- Create and abandoned basket e-mail
- Set-up the abandoned basket trigger
1. Request a new recipient list
The starting point of any e-mail within Episerver Campaign is a recipient list, for your trigger scenarios I would recommend you to request a new recipient list that is designed to support the integration between Episerver Personalization and Episerver Campaign (we support a lot of other ESPs as well). You do this by simply send an e-mail to support@episerver.com.
2. Create an abandoned basket campaign in the Personalization Portal.
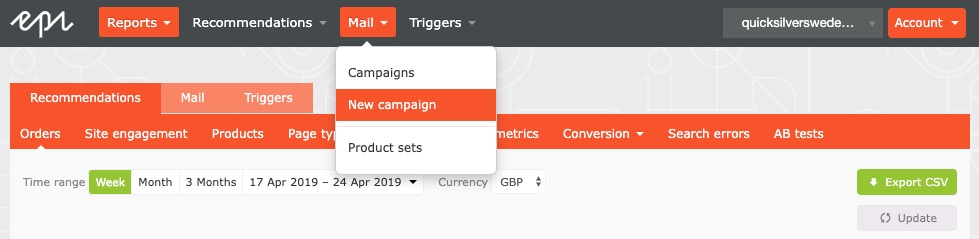
In the personalization portal, navigate to Mail > New Campaign (picture below). The first step allows you to configure the style of the recommendation, Episervers web help has the whole step explained here.
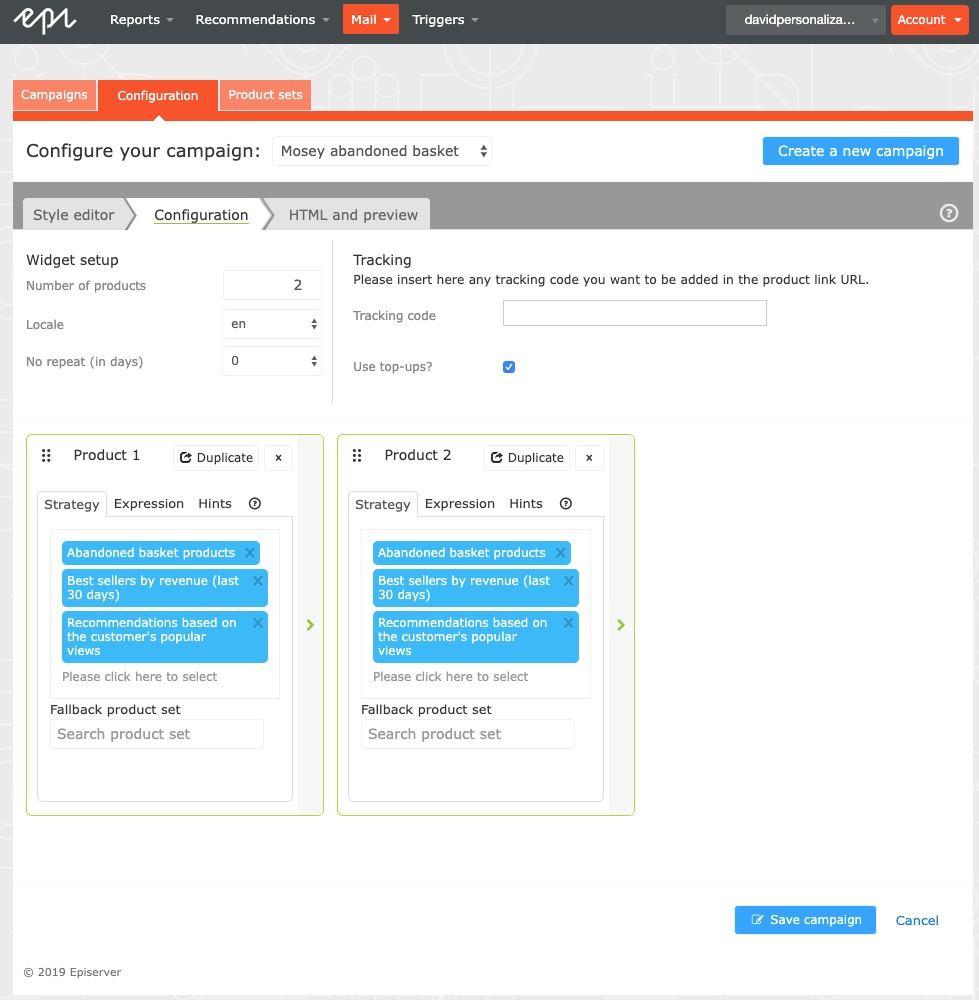
After giving your new Mail Campaign a new and a stylistic touch we move on to the actual configuration of the e-mail strategies we want to apply. This is described in detail in our web help here. Since Episerver utilizes the same process for designing a various amount of e-mail scenarios we must define what strategies we want to apply to our campaign. In this scenario, we're designing an abandoned basket scenario so I will select an abandoned basket as the first strategy.
The strategies are explained here and abandoned basket scenarios are described as "Shows products that were added to the basket but not purchased. Only baskets abandoned within the last 90 days and products currently available are considered." Since there might be scenarios were a visitor already has purchased the product that was abandoned I want to apply other strategies as well, strategy 2 and 3 will be injected if the abandoned basket scenario doesn't apply. If you don't want to decide what strategy to use if the abandoned basket strategy doesn't apply, you can use "top-ups" that will go back to the default algorithm and make sure that the widget doesn't get empty when opening the e-mail.
For the final step, we need to define our ESP and our E-mail field function ({Email}) that is used for that ESP. The field function is the parameter that gets passed back to the recommendations engine in order to serve recommendations, so it's important that you make sure to get this correct. Click "Generate code" and save the codes in an empty document or similar.
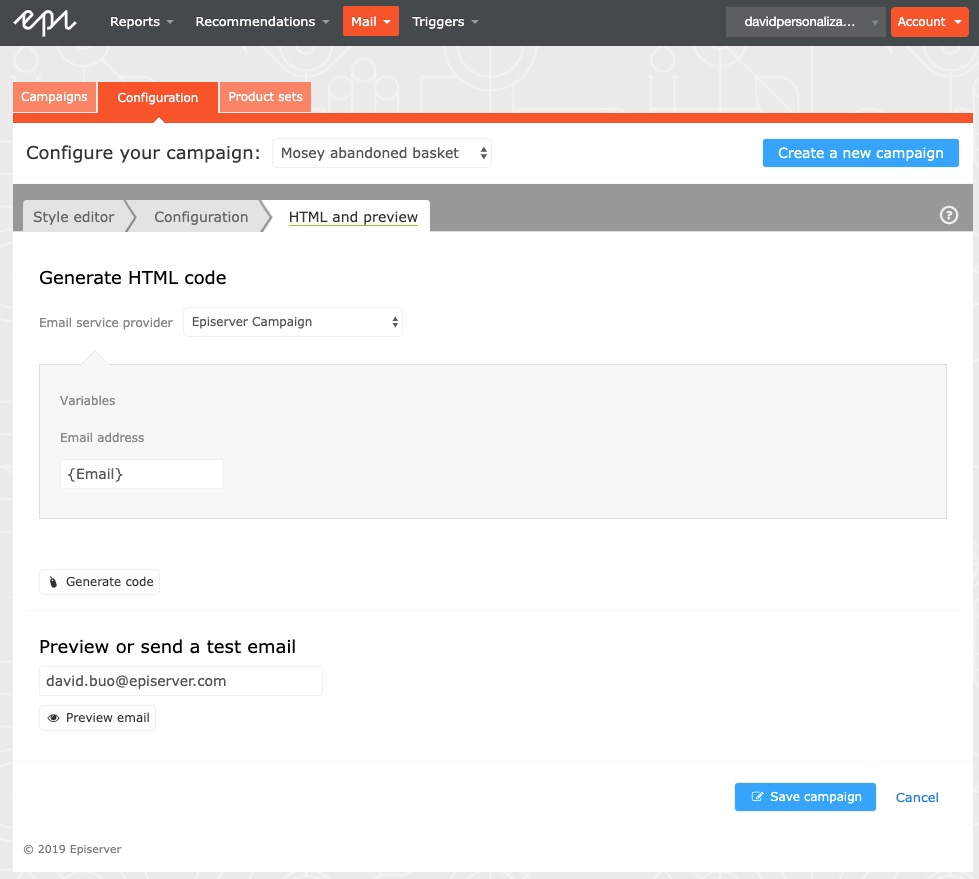
You can now save the Campaign.
3. Create and abandoned basket e-mail
Now it's time to create the actual e-mail that will be sent when someone abandoned a cart. To do that I will create a transactional e-mail in Episerver Campaign, and configure a recommendations block that will render the e-mail recommendations (the abandoned products).
Go to Transactional E-mail and Create a new transactional E-mail. Select your recipient list (as requested in step 1) and give your Abandoned Basket E-mail a name.
Create a recommendations block and copy/paste the links from the Generated code in step 2 for each widget you have configured in the Personalization Mail Campaign (my scenario has 2).
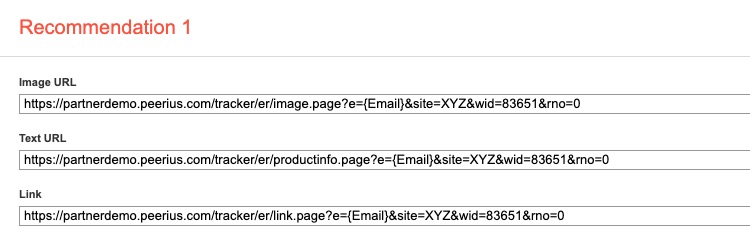
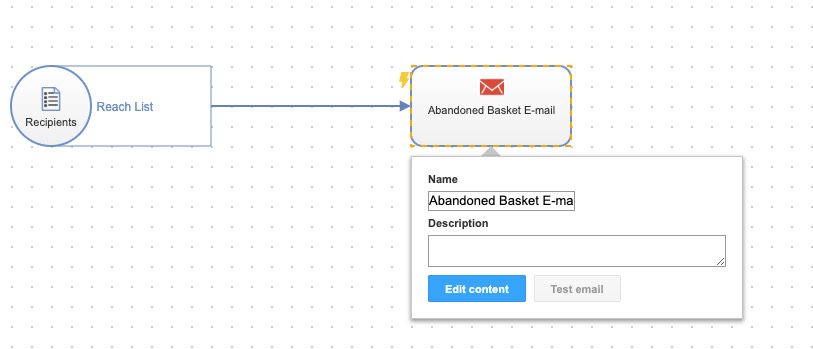
When you're finished with your copy/paste exercise, hit apply and your recommendations block should look something like the picture below.
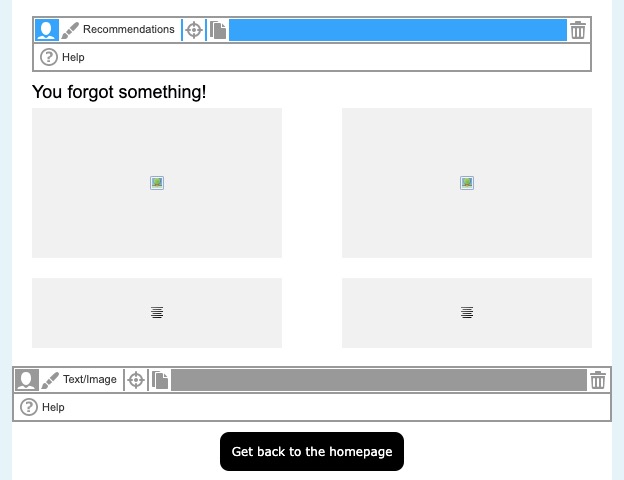
You can test how this e-mail will look by clicking "Test Message" and enter your e-mail address. When you have added some more content to give the e-mail a nice look click "Close" and then "Save and close". Back at the Transactional email dashboard, select your Abandoned basket e-mail and click "Start".
Now we have created recommendations (abandoned basket scenario) and also an e-mail that will render the abandoned products. The final step is to configure the actual trigger.
4. Set-up the abandoned basket trigger
Navigate back to the Personalization portal and go to Triggers and New Campaign

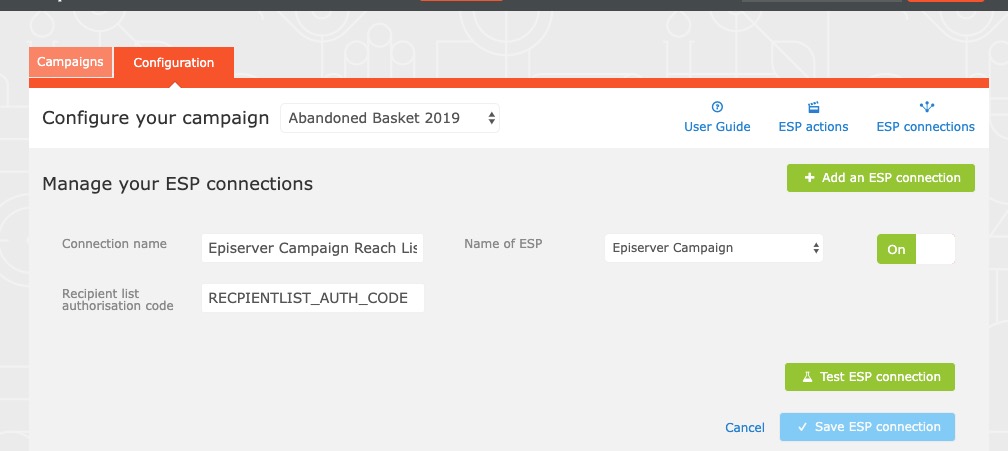
The first time you configure a trigger you need to set-up an ESP connection. The configuration varies depending on your ESP, for Episerver Campaign you need to get your "recipient list authorization code" for the Recipient List that was requested in Step 1 (guide here). Give the connection a name, enter the recipient list authorization code and click "Test Connection". After the test is sucessful, save the ESP connection.
We also need to set up the ESP action. As for the action type, there are three different types for Episerver Campaign: send a message, add a user to a target group and remove a user from a target group. For abandoned basket e-mails, select send a message and paste the ID of abandoned basket e-mail you just created.

Go to Episerver Campaign > Transactional mails to get the ID of your Abandoned Basket e-mail.

To test your ESP action you must first add your e-mail to the recipient list. This is because Episerver Campaign will only send e-mails to customers that have opted in for marketing information, therefore we must add all the recipients that have opted in into Episerver Campaign. After you've added your e-mail, enter it in the empty field and click Test ESP action. You should now receive an e-mail (which indicated that the action is working). If you don't get the e-mail, something is wrong.
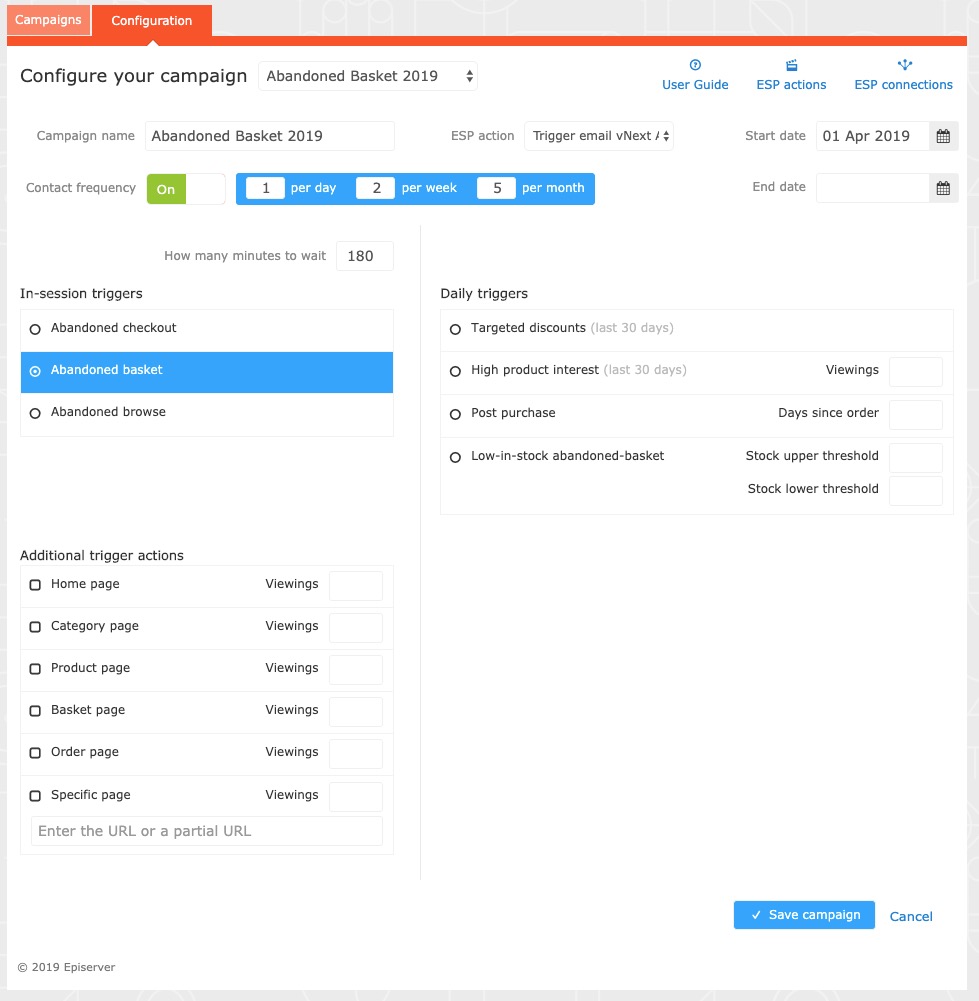
With both the ESP connection and ESP action setup we can now configure the trigger, as you can see you can configure a lot more scenarios than Abandoned Basket. With your scenario configured, hit save and don't forget to activate the trigger by hitting "play" in the trigger campaign overview.
Let's try it out!
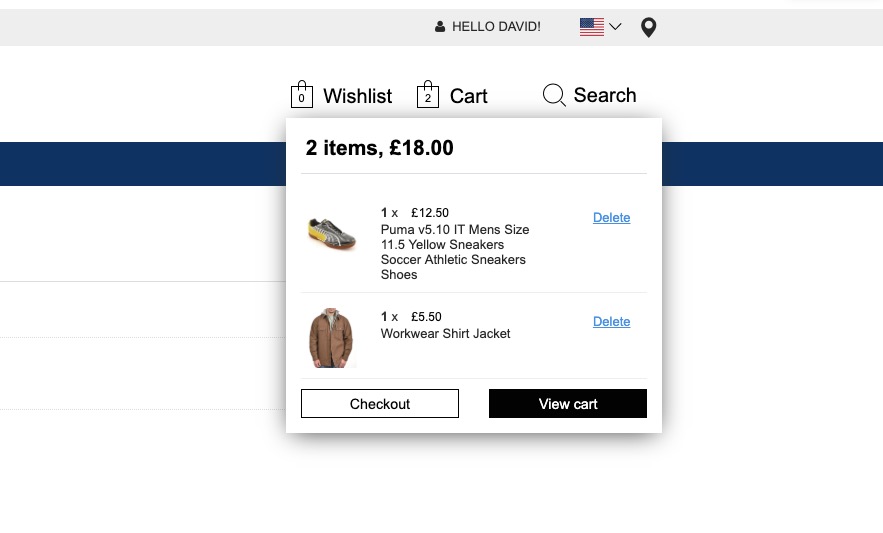
I'll navigate to my demo site, register an account with the same e-mail as I added in Episerver Campaign before (remember, this would be an import/integration in a production scenario). Add two products to the basket and then close my session.
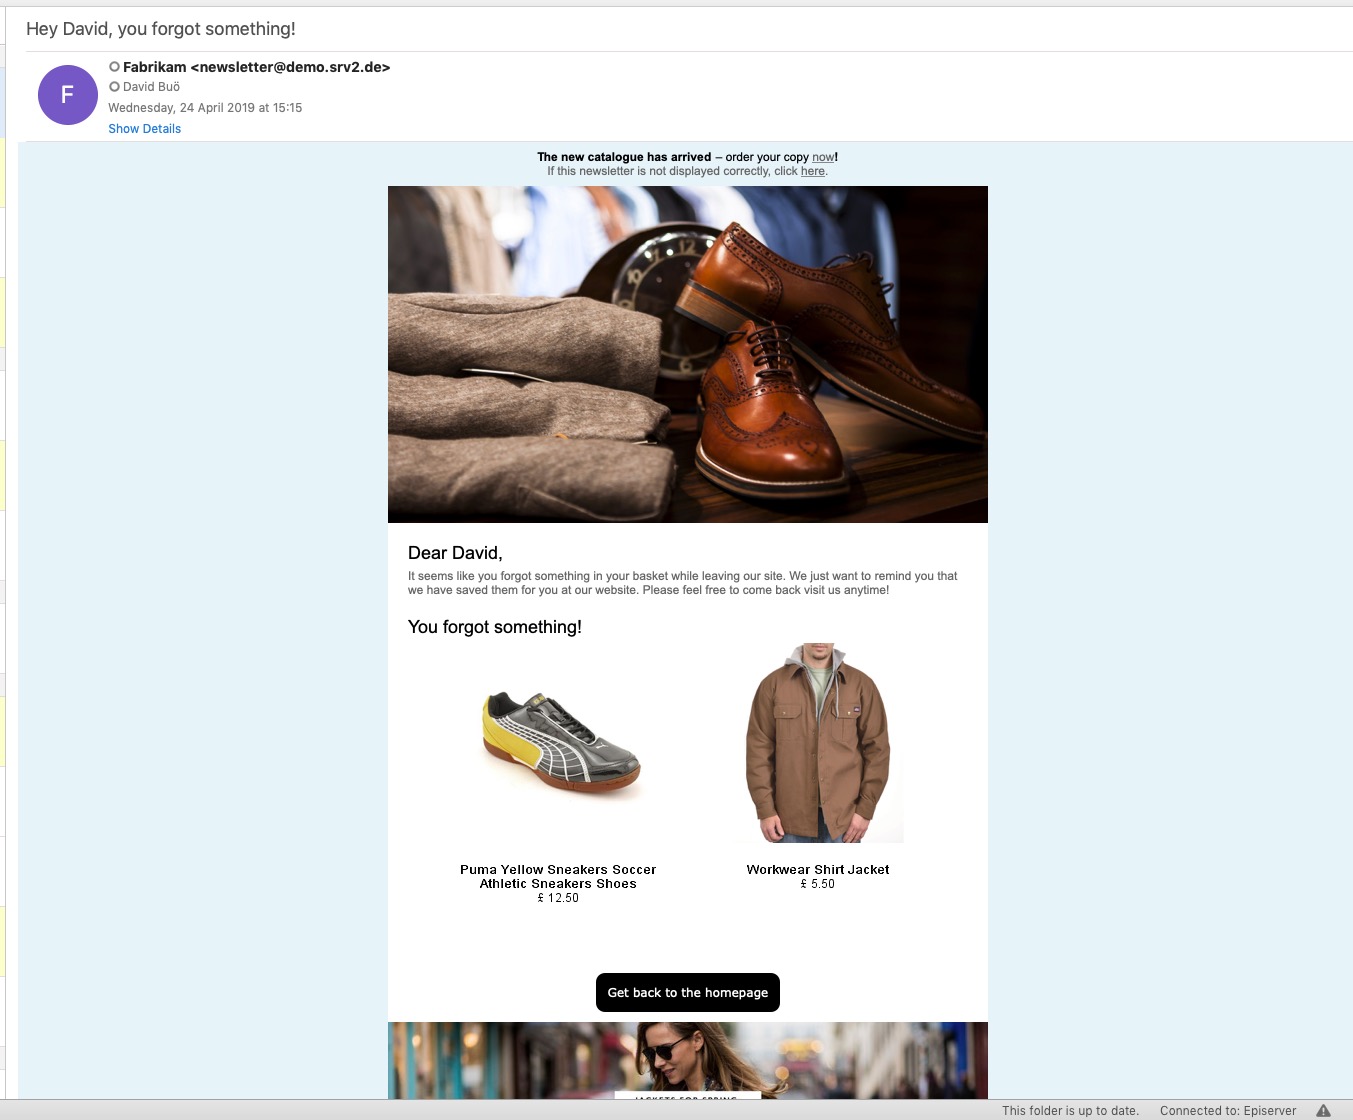
After 180 minutes (according to configuration) I get my abandoned basket e-mail!
I hope you found this hands-on blog interesting and that it helps you generate more sales on your commerce website!
A few questions
Hi Scott,
Good questions, thanks!
1. The difference is an additional 3 parameters in the recipient list. They could have been added to any list really, so it's not a hard requirement to request a new recipient list. From an educational point of view I think its cleaner to create a new list, since that encourages you to think about the import of recipients and if they've given their consent to recieve this type of marketing information. I dont't know why you have to request a new recipient list through our support but thats currently how it works. You can use target groups to works with subsets in most scenarios, maybe that could be one reasons?
2. Yes you can, currently we have about 15 ESPs in the ESP connection configuration including Silverpop, Salesforce, Bronto and a generic template for other ESPs as well. You can still get the same Episerver Personalization links and images to include individual product recommendations in your e-mails.
Thanks for the feedback, yeah I would just expect based upon other platforms recipient lists are just managed in the platform. Episerver support is great but responses are not always as quick as you'd like when busy so I think it's something that really needs to be added to the UI. I thought this was the case with 2. from what I'd been told in the past but I've yet to have exposure to using the UI of personalization and campaing, something I'm trying to set up now.