Installation instructions – Episerver 7.5 Relate
This document describes a first time installation of the EPiServer 7.5 platform with a Relate site. The installation includes CMS, Community, the Relate templates and EPiServer Mail. Refer to the Upgrading section of the EPiServer Relate Developer Guide for information on how to upgrade an existing solution.
Before you start the installation, check the system requirements to ensure that you have the required environment components.
Installing EPiServer 7.5 Relate
This section describes the installation of Relate from EPiServer Deployment Center. It is assumed that you have selected the "Install Relate" option in the previous step. Here you will install and configure a Relate website, including the IIS, database, VPP file storage, and SMTP settings.
Follow the steps below to install Relate
1. Open EPiServer Deployment Center, select EPiServer Relate and expand the appropriate version to see the options.
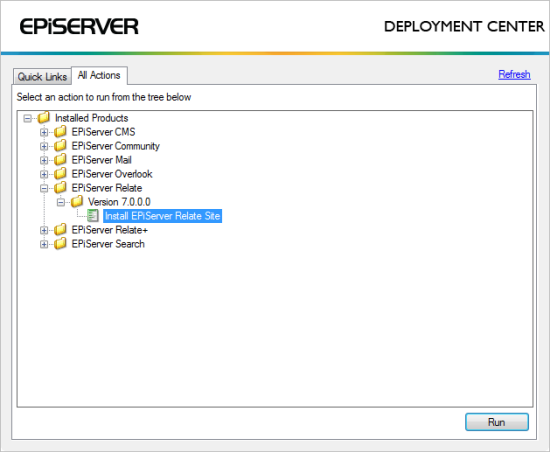
2. Select Install EPiServer Relate Site and click Run to start the installation.
3. Enter values for the IIS configuration:
- Name - name of the site in the IIS instance, type a name or select and existing name.
- Application (Optional) - name of the IIS application where EPiServer CMS will be installed. If left empty, EPiServer CMS will be installed as a website in IIS. If a value is entered, EPiServer CMS will be installed as an application under the site specified in "Name".
- Path - the folder in the file system where the application files will be placed, the suggested value is calculated based on the value in "Name". Can be changed if you want to use a different folder.
- Application Pool Name - name of an IIS application pool that will be used to run the site, the value is calculated based on the value in "Name". Can be changed if you want to use a different application pool, type a name or select an existing application pool.
- Web Server Bindings - lists the bindings that will be set up for the site in IIS, at least one must be included. The list is automatically populated with a row that allows all host addresses but requires a specific port, and the installation script will make sure that this port is not used by another site.
- EPiServer User Interface - Relative Path - the path used to access the user interface. Enter a path that, when combined with any of the site bindings, will access the UI interface. Note that the default value will not be accepted, you have to enter your own value.
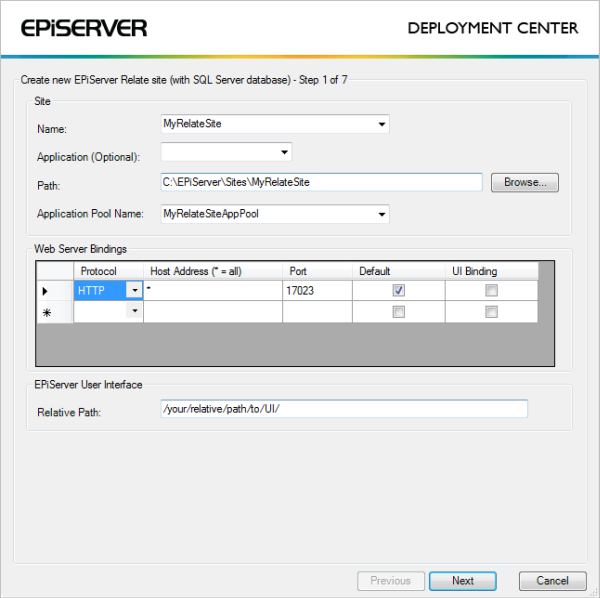
Click Next to continue.
4. Enter values for the SQL configuration:
- Select or Enter the name of the Server instance to use - type the address of an SQL server instance or select an existing instance.
- Select the authentication mechanism the installer should use - the credentials the installer should use to perform database operations. The Windows Authentication option (default) will use the credentials of the user running EPiServer Deployment Center. The SQL Server Authentication option is used when SQL Server is located on a different machine. Selecting this option you can specify a login and password to be used.
- Enter the name of the database to create or select an existing database - type a name or select from existing ones. Note that if an existing database is selected it must contain the EPiServer CMS database schema.
- Select the authentication mechansim EPiServer CMS should use - type a user and password or select an existing user with owner rights to the database. Type the password associated with the specified user, passwords must include lower and upper case, a digit and a non-alphanumeric character).
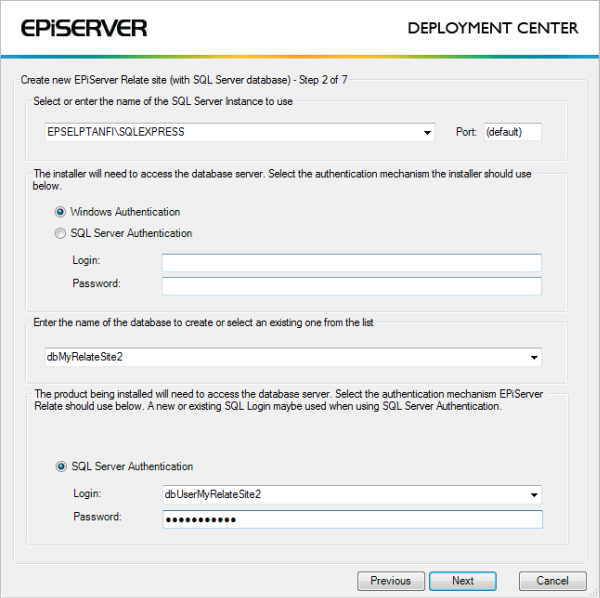
NOTE During the installation, the existing SQL database collation (sort order) will be used when creating the database. If you have specific collation requirements, consider your choice of collation and create a database which meets your requirements ahead of deployment.
Click Next to continue.
5. Enter a Path for the Virtual Path Provider - define the folder in the file system where the default VPP folders (Documents, Global, PageFiles) will be placed. The default value is automatically calculated based on the value in "Name", but can be changed if you want to use a different folder.
Click Next to continue.
6. Provide a path for the license configuration file for the site. This is optional at this point, if left out the site will be created but will report licensing errors. Click Next to continue
7. Create an account for the site administration, enter Administration account username/password. This will be used when logging in to the Relate website the first time. Click Next to continue.
8. Enter values for the SMTP mail server and mailing settings:
- SMTP server settings
Server Address: Enter the name of the SMTP Server instance to use and the Port number. This is the mail server from where the e-mail messages will be sent - if it is the same server as where the EPiServer CMS website resides, entering localhost should be sufficient.
Authentication: None, AuthLogin, CramMD5. Determines the connection authentication.
Username/Password: If required add username and password. - EPiServer Mail Editor settings
Website URL: web address of the site you will be running EPiServer Mail from.
From address: e-mail address from where the e-mail messages are sent. - Default values when creating e-mail messages
From address: e-mail address that is visible in the sent e-mail messages (can be used to mask the e-mail address from where the e-mail messages are sent ).
From name: name of the sender of the e-mail messages.
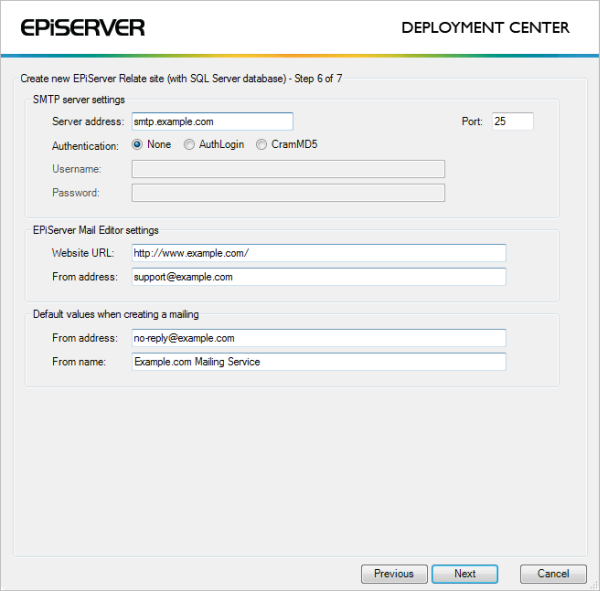
Replace the default values with the values for your mailing settings and click Next to continue.
9. A summary page for the installation will be displayed where it is possible to return to previous steps to change the setup. Click Install to start the installation and let it finalize.
10. When the installation has finalized the Relate website will open in a web browser.
Upgrading
For instructions on breaking changes and how to upgrade between versions, refer to the Upgrading section of the SDK for EPiServer Relate.