Installation Instructions - Episerver Commerce 1.0 SP1
| Product version: | Episerver Commerce 1.0 SP1 |
|---|---|
|
Document version: |
1.0 |
|
Document last saved: |
Introduction
This document describes how to install the EPiServer Commerce product. The EPiServer Commerce installation comprises of assemblies, configuration, database setup and various components. The installation of EPiServer Commerce is done through the EPiServer Deployment Center. Installing an EPiServer Commerce Sample solution is the quickest way to experience the EPiServer Commerce product and its functionality.
After installing EPiServer Commerce and the EPiServer Commerce sample package, the EPiServer CMS website with Commerce Manager will be up and running. In short, the Commerce Manager handles customers, products, marketing etc along will all functionality required to create a complete e-commerce solution where EPiServer CMS website displays the products.
Table of Contents
- Package Overview
- Prerequisites
- Installation Steps
- Downloading and Launching Installation and Sample Files
- Installing EPiServer Commerce
- Installing EPiServer Commerce Sample Package
- First Time Login
- Next Steps
- Related Information
Package Overview
These are the EPiServer Commerce installation components included in the EPiServer Commerce download:
- EPiServer Commerce.msi
This package contains all necessary files to install EPiServer Commerce and core files, this includes PowerShell scripts and assemblies. - EPiServer Commerce Sample.msi
This package contains the sample Commerce Display Templates.
Prerequisites
-
Installation of an EPiServer CMS Version 6 (6.0.530.0) website with an SQL database (public templates not required). Refer to the EPiServer CMS 6 Installation Instructions
-
It is recommended to obtain the licenses needed for EPiServer CMS and EPiServer Commerce prior to the installation. Visit the EPiServer License Center to download licenses, and add the EPiServer CMS license file to the existing website if this hasn't already been done. It is also recommended to add the license file for EPiServer Commerce in the installation procedure, during which it will be requested by the installer.
- See also the system requirements for EPiServer Commerce to ensure that other software and hardware requirements are met.
Installation Steps
When installing the EPiServer Commerce sample site, it is important to perform the steps in the order described below. The installation steps described here assumes that you already have a working EPiServer CMS 6 website with license (see above).
These installation includes the following steps which are described in more detail below:
- Download and launch the EPiServer Commerce installation and sample files.
- Install EPiServer Commerce on the EPiServer CMS site.
- Install the EPiServer Commerce Sample package.
- First time login and verification of the installation.
- Next steps - perform applicable steps in the post-installation Configuration - EPiServer Commerce 1.0 SP1.
Please note the following before you start:
- You will need a Windows user account with admin privileges to install EPiServer Commerce on your server or local machine.
- The SQL admin account used in the installation must be given sysadmin privileges.
- If you install EPiServer CMS at the same time as EPiServer Commerce, ensure that the EPiServer CMS site is installed first, before you go back to Deployment Center and install EPiServer Commerce. Do not install them both simultaneously.
- After the installation, make sure you disable or change the default admin account.
Downloading and Launching Installation and Sample Files
Download EPiServer Commerce. The steps to launch EPiServer Commerce and sample files into the EPiServer Deployment Center are described in the following.
EPiServer Commerce:
-
Launch the EPiServer Commerce.msi. Click Next.
-
Click Install.
-
Wait until the process is finalized, then click Finish.
EPiServer Commerce sample files:
-
Launch EPiServer Commerce Sample.msi. Click Next.
-
Click Install.
-
Wait until the process is finalized, then click Finish.
Installing EPiServer Commerce
EPiServer Commerce consists of two websites: an EPiServer CMS 6 website and a Commerce Manager website. An EPiServer CMS 6 website must be installed before completing the following steps (see prerequisites).
Perform the following steps to install EPiServer Commerce on the existing EPiServer CMS site:
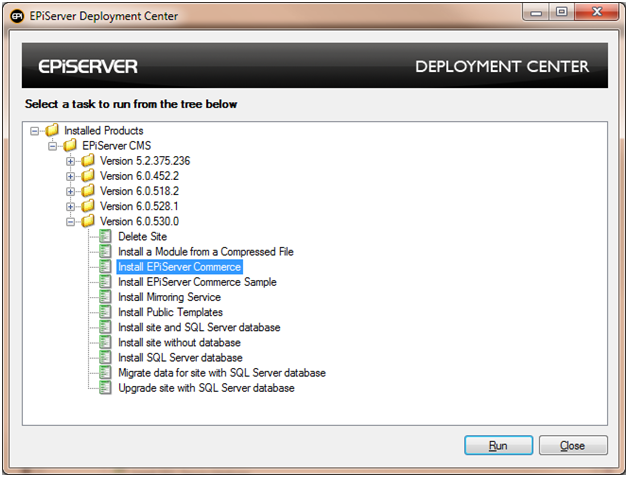
- Start the EPiServer Deployment Center.
- Expand the relevant EPiServer CMS version (6.0.530.0) and select Install EPiServer Commerce and then click Run.
- Check the following settings:
- The EPiServer Commerce core check box must be selected.
- Select Install Commerce Manager if you want to install the Commerce management console.
- Select Install Catalog Page Provider if you want to install the Catalog Page Provider.
All three are required in order to install the EPiServer Commerce sample templates. Click Next.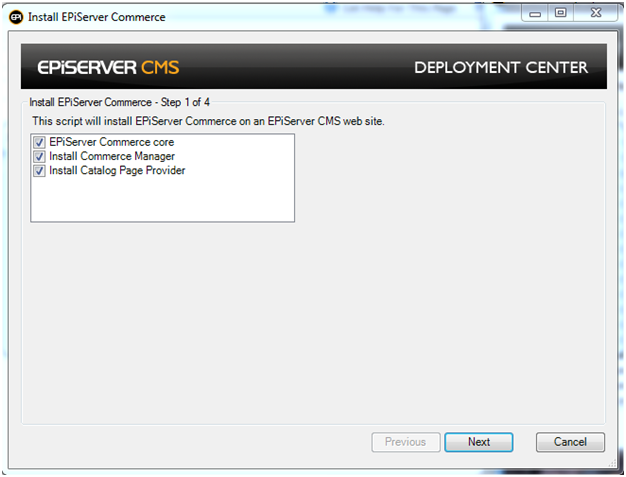
- For the EPiServer Commerce Database Configuration (Commerce Manager), enter the following information:
- Server Name or IP Address field: Enter the name or IP Address of the SQL Server Instance you want to install the Commerce Manager on. Alternatively click Browse to locate the server. Example format: <hostname>\sqlexpress.
- Site Database Name: Enter the desired name of the database to create. If you choose a pre-existing database it will be overwritten.
Database Owner:
The Database Owner / Password fields in the MediaChase Installer are used to create an account which will subsequently be used by the Commerce Manager to access the database. NOTE This account will be created, it does NOT need to pre-exist.
- Database Owner: Enter the desired name of the SQL Login to create. This will be used by the Commerce Manager web application to access the database. You may also use Windows Authentication for this although it is not recommended for security reasons.
- Database Owner Password: Enter the desired password for the Database Owner SQL Login.
SQL Admin User:
The SQL Admin Username / Password in the MediaChase Installer is used to access the SQL Server Instance in order to create the database and database owner. NOTE This account will NOT be created, it should pre-exist and have sufficient privileges to create databases and users in SQL Server. You can also use Windows Authentication as an alternative providing your windows account is an administrator on the SQL Server hosting machine or a Domain Admin.
- SQL Admin Username: Enter the name of an existing SQL Login for the installer to use to create the database and login as detailed above. This Login should have sufficient privileges to create databases and logins in SQL Server. You can also use Windows Authentication as an alternative providing your windows account is an administrator on the SQL Server hosting machine or a Domain Admin.
- SQL Admin Password: Enter the password for the SQL Login entered in SQL Admin Username.
NOTE The MediaChase Installer creates a default super-user account called “admin” (password “store”) to enable you to login to both the EPiServer CMS site and Commerce Manager. This is purely an ASP.NET membership account, It is not, nor does not need to be, an SQL Login.
Click Next to continue.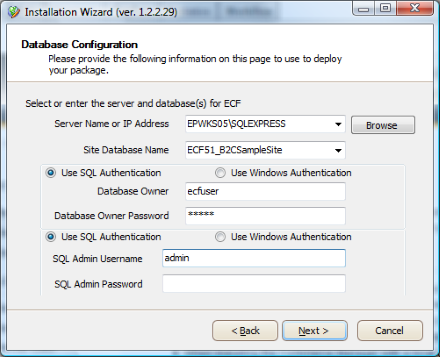
- You are then required to create a new site for the Commerce Manager part. Click on the New Site link.
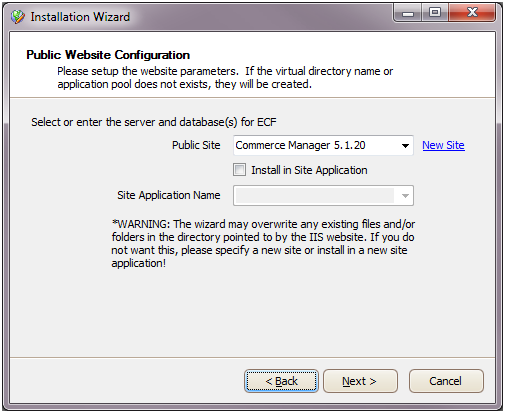
Enter details for the Commerce Manager website:
- Web Site Title: provide a name for the website.
- Port: insert the desired port number.
- Host Header (Optional): enter host header name. Example: <path>\[website title]
- Path to Root: select the desired path for the Commerce manager site. If applicable, map the machine IP address to the Commerce Manager host name/ Host Header.
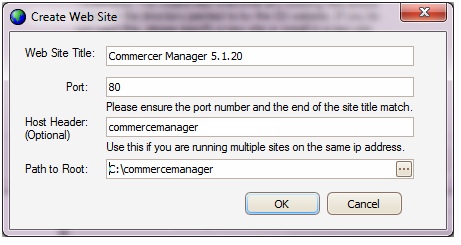
Click OK and then click Next.
- Do the following:
- DO NOT select Install Sample Site and Catalogs - this is option is not applicable in this installation.
- Select Install Quartz Service to enable automated search indexing and add a location for configuring the Commerce Manager shared program files.
- Under Shared Program Files Location, specify where to copy the shared program files.
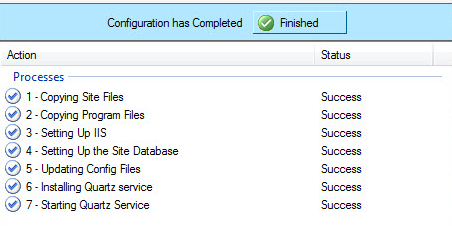
Click Next. - Wait until the components configuration has been completed. On completion click Finished.
- Click Next upon request from the Commerce Manager installer.
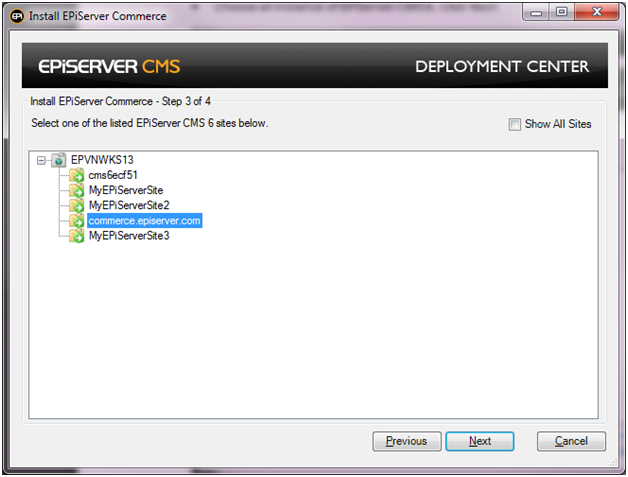
- Choose an instance of a EPiServer CMS 6 website from the list and click Next.
- Select a Display Templates directory (contains all display templates for EPiServer Commerce).
Click Install.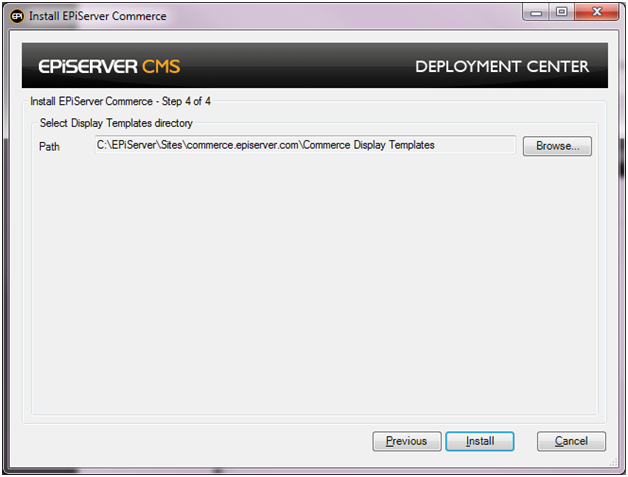
- Click Browse to locate the EPiServer Commerce License to be installed (EPiServerCommerceLicense.config) and then click Install.
NOTE that in order for the EPiServer Commerce sample package to work correctly you are required to install a license. Please refer to the license installation section.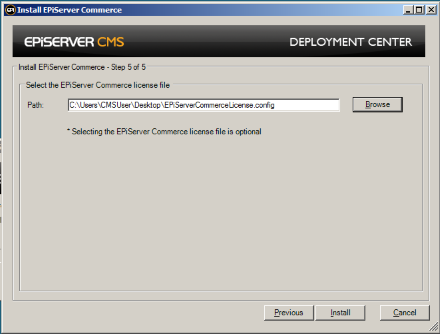
- When the installation is complete, click Close.
Installing EPiServer Commerce Sample Package
Perform the following steps to install the EPiServer Commerce Sample package:
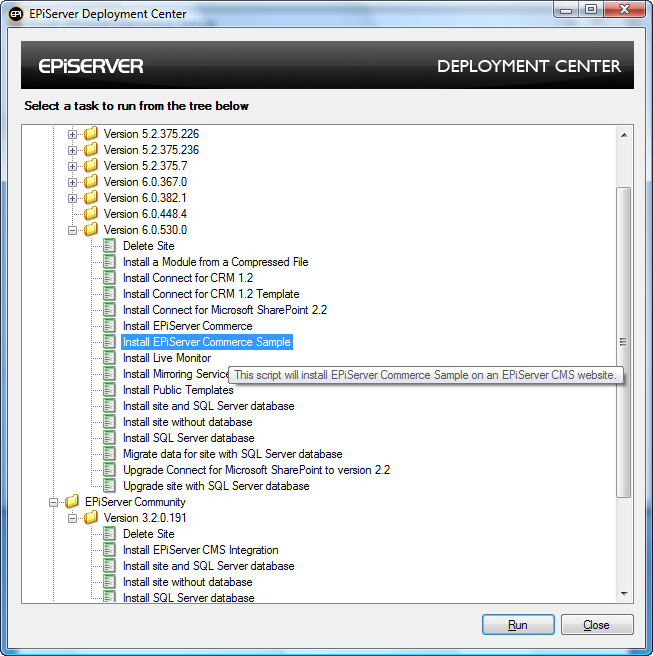
- Start the EPiServer Deployment Center.
- Expand the relevant EPiServer CMS version (6.0.530.0), select Install EPiServer Commerce Sample and click Run.
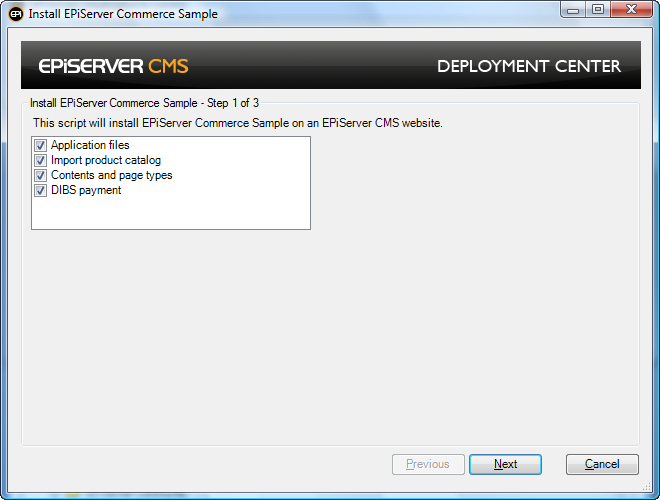
- Select the features you want to install and then click Next:
- Application files: Install the required application files for EPiServer Commerce Sample (required).
- Import product catalog: this will import the Commerce sample product catalog.
- Contents and page types: this will import the sample page types, pages and content.
- DIBS payment: this will install the DIBS payment method (optional).
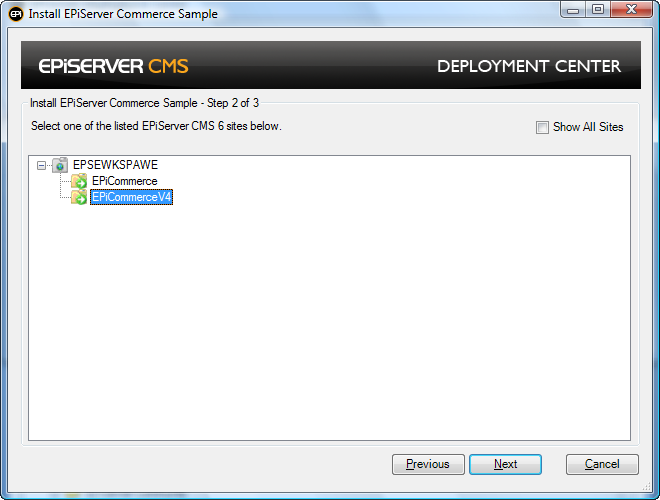
- Select the target site that you want to install EPiServer Commerce Sample on. The website must have EPiServer Commerce core installed (see step 2 above). Click Next.
- The installer will import the sample product catalog if the “Import Product catalog” feature was previously selected.
- Click Install to continue the installation.
- Wait until the installation is complete, and then click Close.
First Time Login
When you install EPiServer Commerce, you are provided with a default account with the following credentials: Username - admin; Password - store. This is used to login both to the EPiServer CMS store site and the Commerce Manager back-end system.
NOTE It is highly recommended that you change this password when implementing your site! This Admin Account is given full privileges, meaning it is full access to all systems and all elements within each sub-system.
Do the following to access the EPiServer Commerce site for the first time:
- Browse to the EPiServer Commerce site previously created and click on the Log in link

- Enter your login details and you will be logged in to the website. To access Commerce Manager, either select Commerce Manager in the top menu of the EPiServer CMS site, or browse to the Commerce Manager site created in step 2 in this installation guide. See the next steps section below for more information on how to proceed from here.
Next Steps
When you have installed and logged in to your EPiServer Commerce sample site, the next step is to carry out some post-installation configurations such as setting up the product page types, and installing the sample catalog and display templates. This is described in more detail in the tech note Post-installation Configuration - EPiServer Commerce 1.0 SP1.
Related Information
For information about using the EPiServer Commerce Sample Package see the EPiServer Commerce Users Guide. For developer information see the EPiServer Commerce Developers Guide.