Installing and Configuring Oracle with EPiServer CMS 6 R2
|
Product version: |
EPiServer CMS 6 R2 |
|---|---|
|
Document last saved: |
Scope
This document explains how to configure an EPiServer CMS 6 R2 site with Oracle database and some preliminary steps that should be performed.
This document DOES NOT explain how to:
- Install Oracle database server or client
- Install EPiServer CMS
- Install or configure IIS
Prerequisites
All prerequisites are valid for an EPiServer CMS 6 installation (see system requirements); there are some further prerequisites for configuration with an Oracle database - which are:
-
Oracle Data Provider for .NET (11g)
Note: Is down-loadable form Oracle in one package “Oracle 11g ODAC” must be installed on the same machine as EPiServer. -
Oracle ASP.NET Providers (11g)
Note: Is down-loadable form Oracle in one package “Oracle 11g ODAC” which must be installed on the same machine as EPiServer. - Oracle Server (any of following):
a. Oracle 9i 32 bit (Windows server)
b. Oracle 10g R2 32/64 bit (Windows server)
c. Oracle 11g 32/64 bit (Windows server)
Note: The Oracle Servers listed above can be running on a separate server. - “Oracle 11g ODAC” 32-bit flavor since Deployment Center runs in 32-bit mode. Otherwise you can Install Oracle Configuration manually.
- EPiServer is compiled against ODAC 11.1.0.6.21 though multiple and different versions of ODP.NET(Oracle Clients) can live on the same box. The application can target whatever version specific one you need using assembly redirect.
- For ODAC 11gx64, download Oracle Database Client 11.1.0.6,11.2.0.1.0 for Windows x64, or 11.1.0.7 for Windows Server 2008x64.
Installation Instructions
1. Install Oracle Configuration
- Download and Install EPiServer CMS 6 R2.
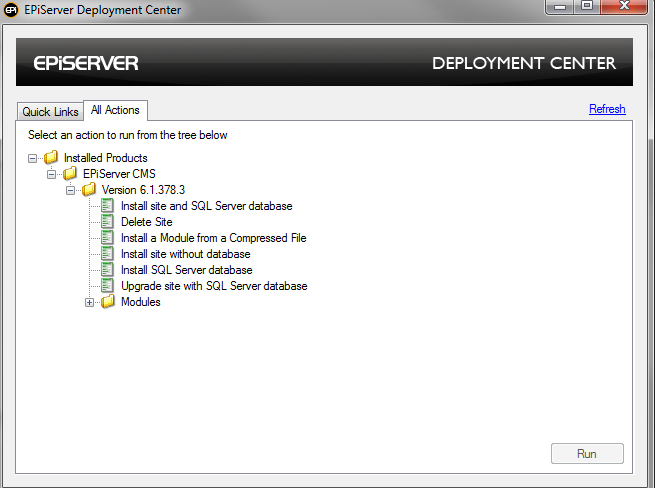
- Install an "EPiServer CMS site" from the Deployment Center - using the option "Install site without database".
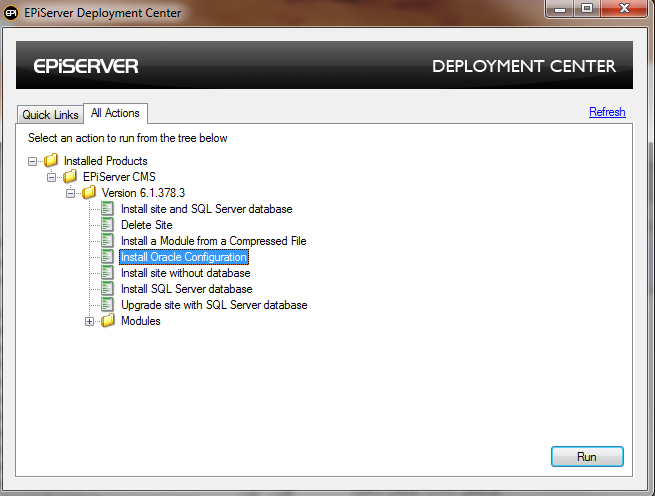
- Open <EPiServer HOME>\Install\System Scripts\Install Oracle Configuration.meta data and modify it as below:
<package version="1.0" id="UpgradeSite">
  <!--Uncomment below action to able to run Oracle Install-->
  <action id="InstallOracle" displayName="Install Oracle Configuration" scriptPath="Install Oracle Configuration.ps1" actionType="Install">
    <description>Installs an EPiServer CMS web site with Oracle database</description>
  </action>
</package>
- Then you'll be able to Install Oracle Configuration through Deployment Center.
The changes required for configuring EPiServer CMS 6 R2 on an Oracle database will be performed on the site selected.
<EPiServer HOME> in these instructions is the path EPiServer CMS 6 is typically installed on: “C:\Program Files\EPiServer\” or “C:\Program Files (x86)\EPiServer\” on 64-bit machines.
<ORACLE HOME> is a directory where you installed your oracle client components, for example “C:\OracleClient\”.
2. Install EPiServer Database on Oracle
- Open the SQL Plus Oracle command line client and log in as “system” user.
NOTE: the password of the system user is set during Oracle Server installation and should be known by DBA. - In SQLPlus create a tablespace by executing the following line:
CREATE TABLESPACE EPISERVER_DATA
LOGGING DATAFILE 'C:/oraclexe/oradata/epdev/EP_DATA.dbf'
SIZE 500M
EXTENT MANAGEMENT LOCAL;
NOTE: The path is relative to the machine Oracle is installed on and can be changed, if the path is changed remember that Oracle needs to have write permission on it. “EP_DATA.dbf” will be created by Oracle and its name can be changed. Also note that tablespace creation is an example which can be changed with the DBA approval. - In SQLPlus copy and paste the following lines of code (Note - you can change the “EPISERVER” user name to one of your preference):
CREATE USER EPISERVER IDENTIFIED BY EPISERVER
DEFAULT TABLESPACE EPISERVER_DATA
TEMPORARY TABLESPACE TEMP;
GRANT CONNECT, RESOURCE TO EPISERVER;

GRANT CONNECT, RESOURCE TO EPISERVER;
GRANT CHANGE NOTIFICATION TO EPISERVER;
GRANT CREATE JOB TO EPISERVER;
GRANT CREATE PUBLIC SYNONYM TO EPISERVER;
GRANT CREATE PROCEDURE TO EPISERVER;
GRANT CREATE ROLE TO EPISERVER;
GRANT CREATE SESSION TO EPISERVER;
GRANT CREATE TABLE TO EPISERVER;
GRANT CREATE VIEW TO EPISERVER;
GRANT CREATE VIEW TO EPISERVER;
GRANT DROP PUBLIC SYNONYM TO EPISERVER;
GRANT UNLIMITED TABLESPACE TO EPISERVER; - In SQLPlus, connect as the newly created user ("EPISERVER" in this example) and execute the following Oracle scripts as below:
a.@<EPiServer HOME> \Framework\6.<subversion>\Database\Oracle\sql_empty_db.sql
b..@<EPiServer HOME> \Framework\6.<subversion>\Database\Oracle\sql_proc.sql
c. @<EPiServer HOME> \CMS\6.<subversion>\Database\Oracle\sql_empty_db.sql
d. @<EPiServer HOME> \CMS\6.<subversion>\Database\Oracle\sql_proc.sql(*)
e. @<ORACLE HOME>\product\11.1.0\client_1\ASP.NET\InstallAllOracleASPNETProviders.sql
(*) NOTE: If you are running on Oracle Database 11gR2(11.2.0.1) this script will hang due to the Oracle Bug number 9278351 "SELECT FOR UPDATE OF" HANGS IN 11.2.0.1" . In this case applying the correspondent Oracle patch is a requirement.
- Open <ORACLE HOME>\product\11.1.0\client_1\Network\Admin folder edit by using text editor the file “tnsnames.ora”. If the file is not present, open your text editor and create new a file with the name “tnsnames.ora” (note that this file name is mandatory).
Copy and paste the following lines of code in tnsnames.ora file and then save the file:EPISERVERORACLE =
(DESCRIPTION =
(ADDRESS = (PROTOCOL = TCP)(HOST = <hostname or IP>)(PORT = <port>))
(CONNECT_DATA =
(SERVER = DEDICATED)
(SERVICE_NAME = <database service name>)
)
)
NOTE: 1. Substitute <hostname or IP>, <port> and <database service name> with appropriate names.
2. This is an example of the Oracle client configuration according with the tnsnames.ora found under the Oracle db server. - Open the connectionStrings.config file of your “EPiServer CMS site" and add the following line to the new user created if not existing:
<add name="EPiServerDB_oracle" connectionString="Data Source=EPISERVERORACLE;User Id=EPISERVER;Password=EPISERVER;" providerName="Oracle.DataAccess.Client"/>NOTE: the connectionString attribute contains Data Source section that is identical to the data source alias for Oracle which is inserted in tnsnames.ora file
3. Install Alloy Templates.
If you wish, now you can Install Alloy Templates from Deployment Center.

The configuration of EPiServer CMS 6 R2 Web site with the Oracle database installation should now be complete.
Upgrading EPiServer CMS 6.0 to EPiServer CMS 6 R2 with an Oracle Database
1. Preparation
- Install EPiServer CMS 6 R2
- Backup the database and set up a test environment with your EPiServer CMS 6.0 on Oracle ready to be upgraded.
2. Upgrade Database
In SQLPLUS connected to <EPISERVER> user run the Oracle upgrade scripts, provided in the EPiServer CMS 6 R2 installation, in the following order:
@"C:\<frameworkHome>\<FrameworkVersion>\Upgrade\Database\Oracle\0006_0000_0318_0113to0006_0002_0127_0000.sql"
@"C:\<frameworkHome>\<FrameworkVersion>\Upgrade\Database\Oracle\0006_0002_0128_0000to0006_0002_0130_0000.sql"
@"C:\<frameworkHome>\<FrameworkVersion>\Upgrade\Database\Oracle\0006_0002_0131_0000to0006_0002_0138_0000.sql"
@"C:\<frameworkHome>\<FrameworkVersion>\Upgrade\Database\Oracle\0006_0002_0139_0000to0006_0002_0228_0000.sql"
@"C:\<frameworkHome>\<FrameworkVersion>\Upgrade\Database\Oracle\0006_0002_0229_0000to0006_0002_0256_0000.sql"
@"C:\<EPiserverCmsHome>\<EPiserverCmsVersion>\Upgrade\Database\oracle\0006_0000_0530_0000to0006_0001_0233_0000.sql"
@"C:\<EPiserverCmsHome>\<EPiserverCmsVersion>\Upgrade\Database\oracle\0006_0000_0612_0000to0006_0000_0829_0000.sql"
@"C:\<EPiserverCmsHome>\<EPiserverCmsVersion>\Upgrade\Database\oracle\0006_0001_0234_0000to0006_0001_0236_0001.sql"
@"C:\<EPiserverCmsHome>\<EPiserverCmsVersion>\Upgrade\Database\oracle\0006_0001_0237_0000to0006_0001_0287_0000.sql"
@"C:\<EPiserverCmsHome>\<EPiserverCmsVersion>\Upgrade\Database\oracle\0006_0001_0288_0000to0006_0001_0316_0000.sql"
3. Upgrade Site
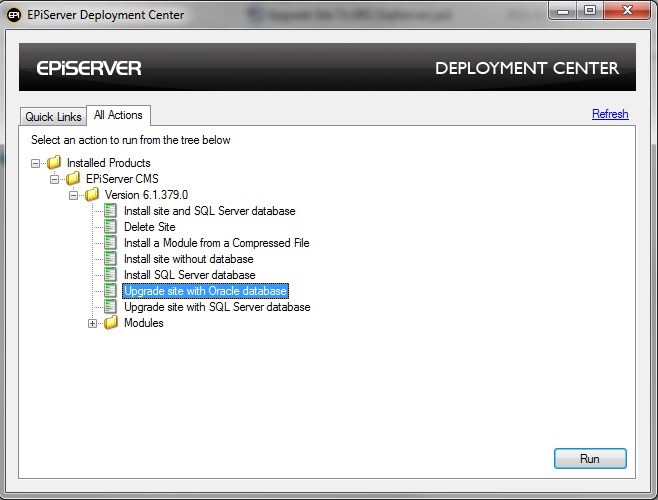
- Open <EPiServer HOME>\CMS\Upgrade\System Scripts\Upgrade Oracle Site.meta data and modify it as below:
<package version="1.0" id="UpgradeSite">
  <!--Uncomment below action to able to run Oracle Upgrade-->
  <action id="UpgradeFrom52WithoutDatabase" displayName="Upgrade site with Oracle database" scriptPath="Upgrade Site (Oracle).ps1" actionType="Upgrade">
    <description>Upgrades an EPiServer CMS web site from any 5.2 SP2 version to 6.0 without upgrading the database</description>
  </action>
</package>
- Running Deployment Center it will appear the option "Upgrade site with Oracle database"
If you wish, now you can upgrade an EPiServer CMS 6 site from the deployment center.