Integrating EPiServer CMO with external applications
Note: This topic has no later version.
This document describes exposed APIs for a web service in EPiServer CMO to update generic KPI values for online campaigns (not A/B testing). The following campaign KPIs are used in EPiServer CMO:
- Conversion path KPI shows the value of reaching the last page of a conversion path by the users
- Generic KPI is used in integration with external applications
With EPiServer CMO it is possible to create KPIs for monitoring information related to a specific campaign page, for example, the number of page views or form submits on the page. Unlike KPI for page, campaign KPI represents the information about the whole campaign.
Generic KPIs
Briefly generic KPI can be used to integrate EPiServer CMO with other applications in the following way:
- The CMO administrator registers external application in CMO settings.
- The CMO user creates campaign and adds generic KPI for that application.
- The application updates KPI value using web service.
- The KPI is being displayed on campaign report page or on dashboard gadget.
User case for Generic KPI
A practical example of use of generic KPIs: Imagine that you are the owner of a web shop based on EPiServer CMS and Commerce, and you use EPiServer CMO. You spend a lot of money on different kind of ads to promote your shop and products. You have a number of ongoing campaigns, and want to see how effective they are. You want to see how many orders you have in your web shop today or last week.
The number of orders is an example of generic KPI. In this case, the external application is your web shop system to integrate EPiServer CMO with.
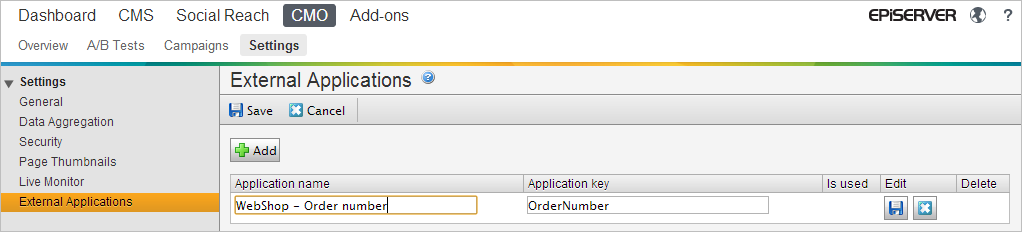
Administering external applications for integration
You need administrative permissions to register your web shop as an external application. Go to CMO > Settings > External Applications. Click Add, type the application name and the key. Save your settings.
Adding a campaign
Add a campaign and define campaign name, start and end dates, select required pages and go to KPI Settings tab.
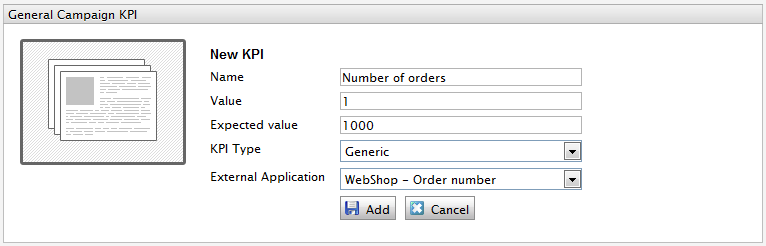
Click Add new KPI in General Campaign KPI section to create new generic KPI for external application defined on first step.
Click Add to apply the KPI settings. Save and start your campaign.
Using the Generic KPI service
After EPiServer CMO deployment you will have new web service on your site available at http://[Your Site URL]/CmoWebServices/GenericKpiService.svc. Using this service external application can update value of generic KPI by corresponding key.
Service proxy code can be generated in Visual Studio. Turn authorization settings off in location section for CmoWebServices path to make web services public in development environment:
<location path="CmoWebServices">
  ...
  <system.web>
    <authorization>
      <allow users="*" />
    </authorization>
  </system.web>
  ...
</location>
Of course you should not make services public in production.
Add a service reference in Visual Studio project, and point it to generic KPI service URL. Define the required namespace and click OK to create the service proxy code as follows:
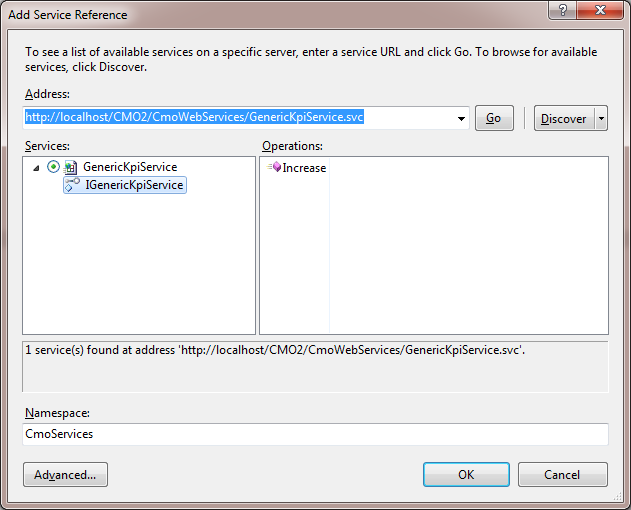
Visual Studio will add corresponding WCF settings in your web.config file. Now you can update KPIs using the following code:
GenericKpiServiceClient serviceClient = new
GenericKpiServiceClient();
serviceClient.Open();
bool updated = serviceClient.Increase("OrderNumber", 1);
serviceClient.Close();
OrderNumber here is the external application key which we have registered above. This code updates all generic KPIs created for that external application in all active campaigns, in this case it is generic KPI “Number of orders”.
Increase service method returns true if operation is completed successfully and at least one generic KPI for specified key was found and updated, otherwise the increase method will return false.
Monitoring Generic KPI
You can use this code into your web shop project and update KPIs after your customer have submitted new order. Add the CMO KPI Summary gadget for “Number of orders” and monitor your dings on dashboard:
Configuring security
You can make services public on development machine, but of course you need to limit access to CMO web services in production environment.
For CMO web services you use the same approach as for CMS web services as described in the following tech note:
Enabling Basic Authentication on the website
By default you are recommended to use EPiServer basicAuthentication and provide access to services for defined roles. Make sure that you have enabled basic authentication HTTP module in section /configuration/system.webServer/modules.
<system.webServer>
  <modules runAllManagedModulesForAllRequests="true">
    <add name="BasicAuthentication" type="EPiServer.Security.BasicAuthentication, EPiServer" preCondition="managedHandler" />
  </modules>
</system.webServer>
Configuring security settings for CMO services
Location settings for CMO web services should contain a list of allowed roles and enabled basic authentication as follows:
<location path="CmoWebServices">
  ...
  <episerver.basicAuthentication sendBasicChallenge="true" basicRealm="" />
  <system.web>
    <authorization>
      <allow roles="WebServices,Administrators" />
      <deny users="*" />
    </authorization>
  </system.web>
     ...
</location>
You also need to enable basic authentication in the client configuration. Update security mode and client credentials type in your binding settings as follows:
<system.serviceModel>
  <bindings>
    <basicHttpBinding>
      <binding name="BasicHttpBinding_IGenericKpiService" ... >
        ...
        <security mode="TransportCredentialOnly">
          <transport clientCredentialType="Basic" proxyCredentialType="None" realm="" />
        ...
        </security>
      </binding>
    </basicHttpBinding>
  </bindings>
  ...
</system.serviceModel>
Configuring security settings in the client code
In the client code you need to provide user name and password for authentication as follows:
GenericKpiServiceClient serviceClient = new GenericKpiServiceClient();
serviceClient.ClientCredentials.UserName.UserName = "userName";
serviceClient.ClientCredentials.UserName.Password = "userPassword";
serviceClient.Open();
bool updated = serviceClient.Increase("OrderNumber", 1);
serviceClient.Close</a>();
Note Do not allow the users for service communication to have any administrative permissions in your application.
Last updated: Mar 31, 2014