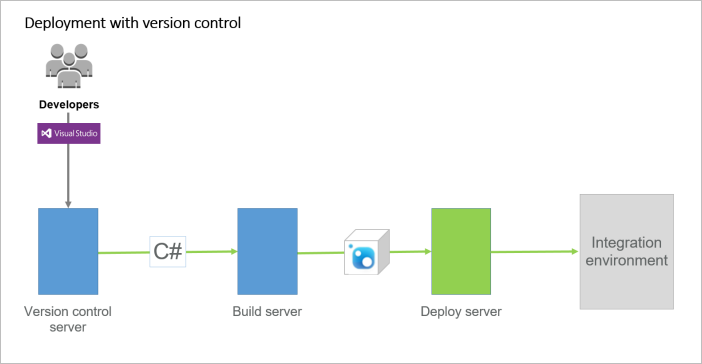
This article provides an example of how to manage continuous deployment for Episerver solutions. In this scenario we are using Octopus Deploy, to deploy code changes to the Integration environment in Episerver Digital Experience Cloud (DXC) Service, the cloud-based service offer from Episerver using Microsoft cloud technology.
An existing website running in the Integration environment, with a URL to which you will publish your code changes.
A deploy server running Octopus Deploy.
Information from Episerver required for publishing in DXC Service:
Client application ID
Password key
Subscription ID
Tenant ID
Procedure overview
This scenario assumes a first-time setupand deployment of code changes for a customer project to an Octopus server and the Integration environment. There are different options for configuring your Octopus server, depending on how you prefer to manage continuous deployments. In the steps below, we will configure Octopus to automatically create a release and deploy to the DXC Integration environment, each time the project is built.
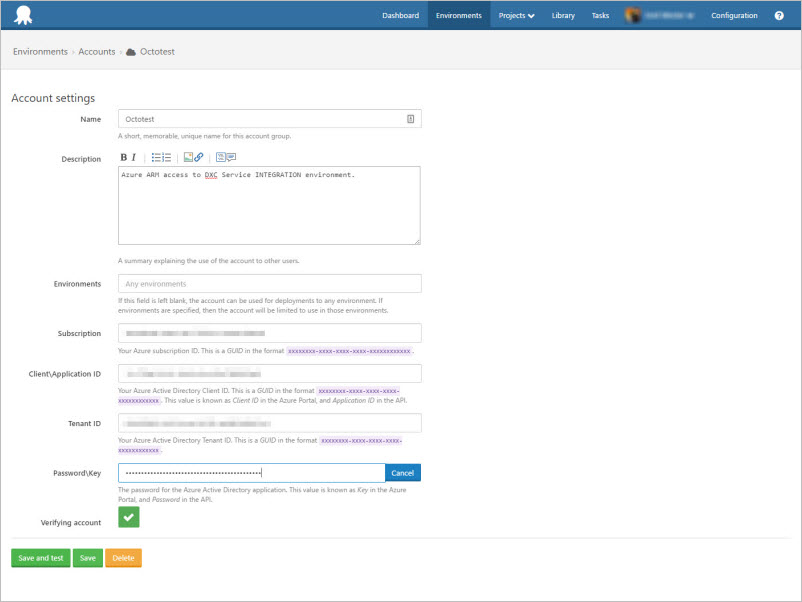
In Octopus, go to Environments>Accounts, and create a Service Principal account for the project.
Add a project name and description, and the Client\Application ID, Subscription ID, Tenant ID, and Password\Key values received from Episerver.
Click Save.
STEP 2. Configure Octopus
As this is a first-time deployment setup, you need to create an environment, modify the lifecycle, create a project group, a customer project, and an Octopus user. If you already have these items in place, you can skip these steps.
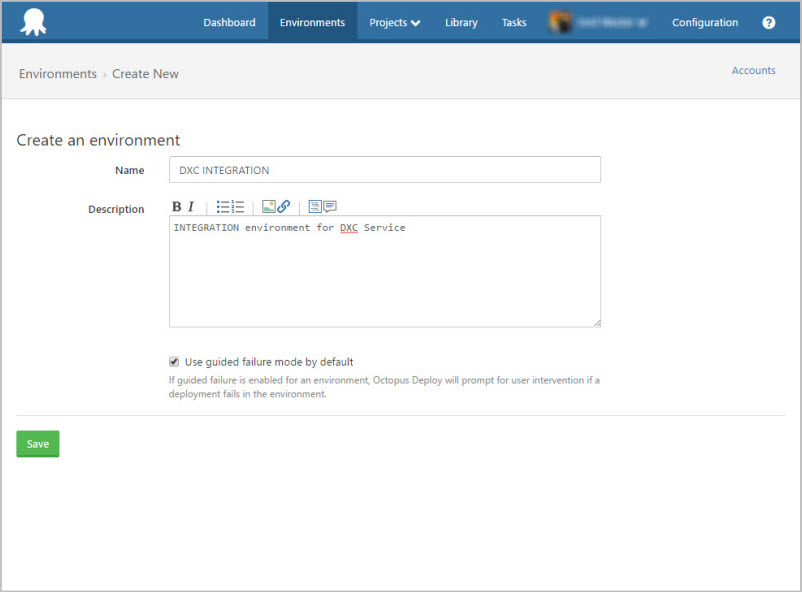
In Octopus, go to Environments > Create new.
Add a name and description of the environment, and click Save.
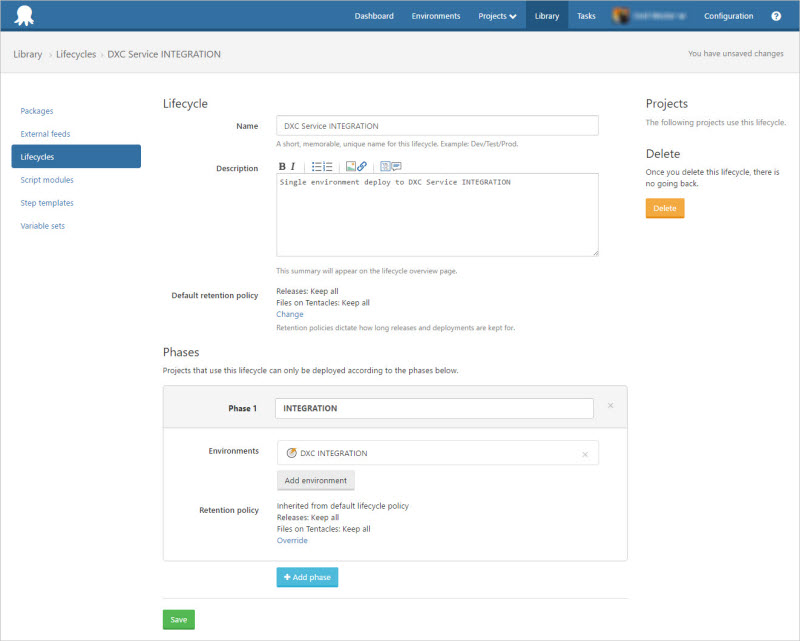
Go to Library > Lifecycles and add a lifecycle: Add a name and description, and add a phase with the environment previously created. Click Save.
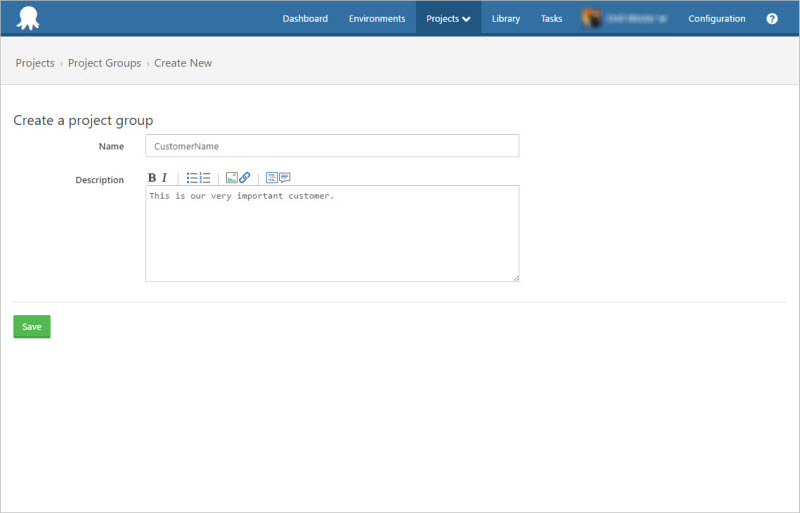
Under Projects, create a project group for the customer (if applicable), add a name and description. Click Save.
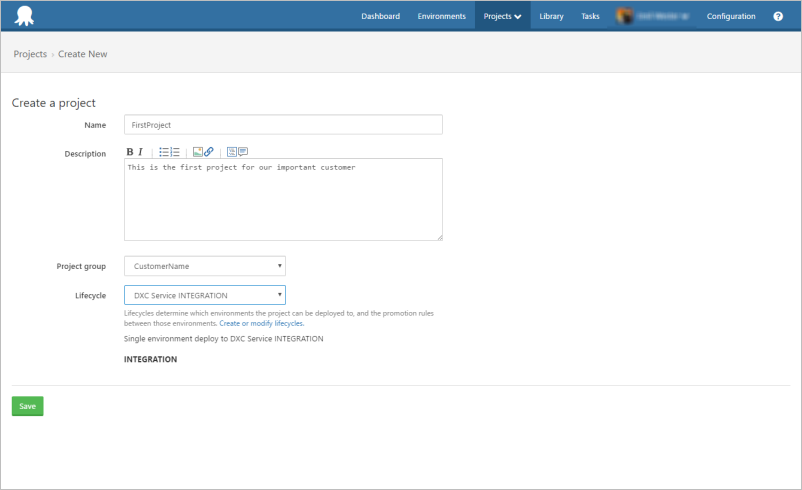
Under Projects, create a project, add a name and description, and associate it with the project group and lifecycle created in previous steps. Click Save.
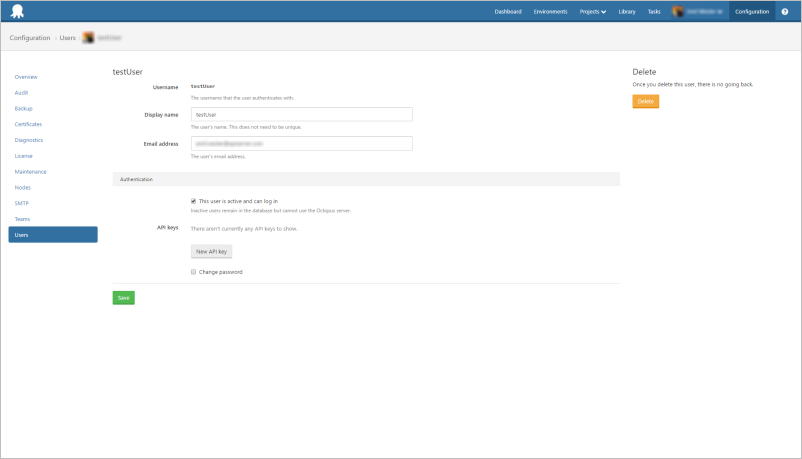
Go to Configuration > Users, and create a deployment user for your Octopus server. Add user information and click New API key to generate a deployment key. The user can be used for multiple projects, and you might already have an existing deployment user if you have worked with Octopus before.
STEP 3. Configure project in Visual Studio
In this step you will configure Visual Studio to create Octopus-compatible NuGet packages, and push them to your Octopus deploy server. This step needs to be done for each new project.
In Visual Studio, right-click on References, locate the OctoPack package and click Install to add it to the project.
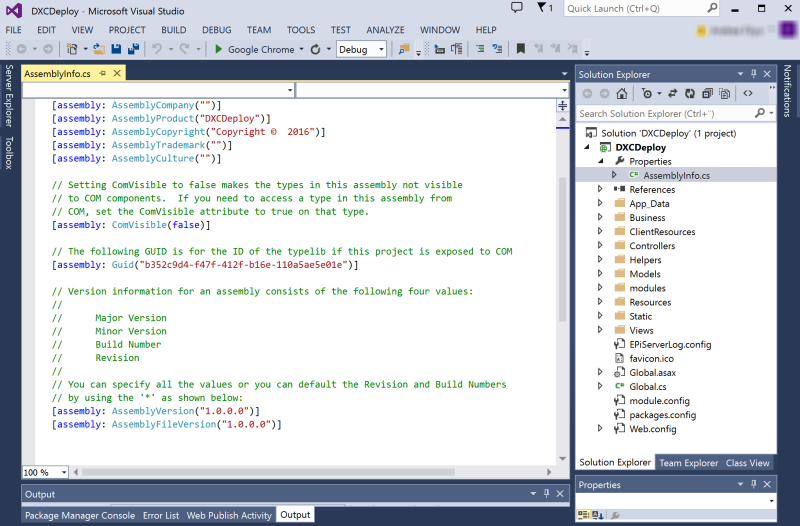
Ensure that you are applying proper versioning settings when building components for your project, as Octopus will use these in the deployment process. Check AssemblyInfo to verify these settings.
Right-click on project and select Unload Project.
Right-click on project and select Edit... to edit the csproj.file for the project.
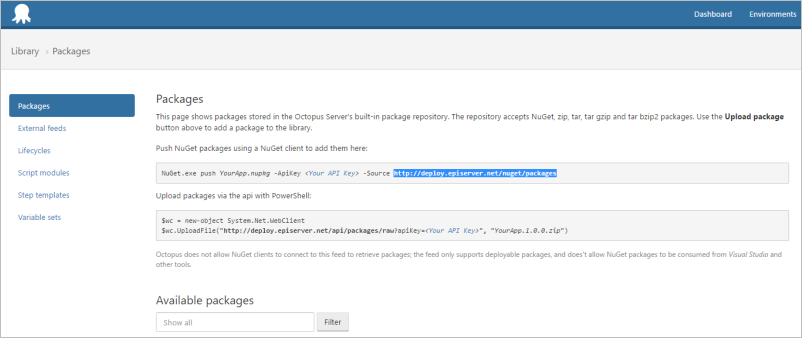
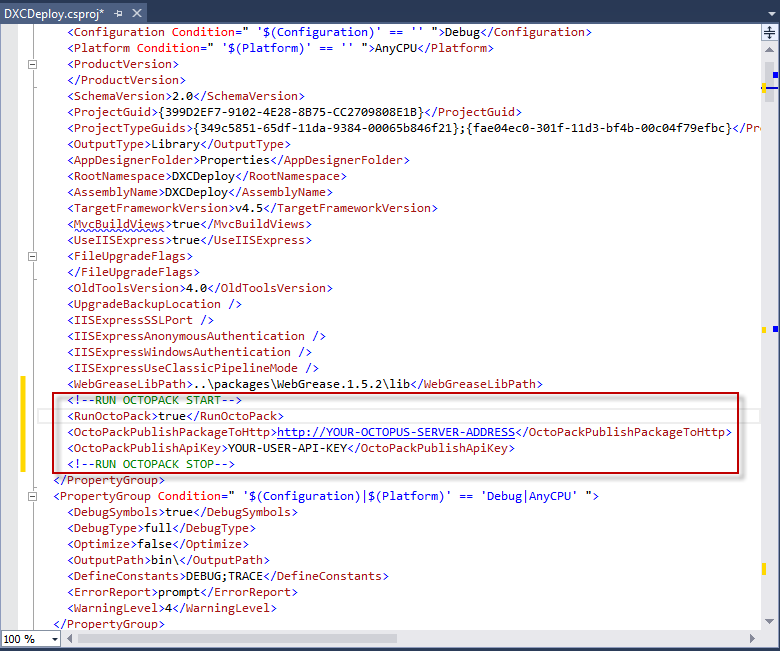
Edit the csproj file to add the URL and API key for your Octopus server. The URL can be retrieved in Octopus under Packages, and the API key can be found in Configuration > Users (see STEP 2 above).
Add the following code to the <PropertyGroup> section in the csproj.file:
Reload and build the project. A an OctoPack package is created, and pushed to the Octopus server on the URL you specified. A succesful console build message will look something like this: OctoPack: Packaging an ASP.NET web application (Web.config detected) OctoPack: Attempting to build package from 'dxcdeploy.nuspec'. OctoPack: Successfully created package 'c:\users\name\documents\visual studio 2015\Projects\dxcdeploy\dxcdeploy\obj\octopacked\dxcdeploy.1.0.6010.25791.nupkg'. OctoPack: OctoPack successful Pushing octotest 1.0.6010.25791 to 'http://your-octopus-server-address/nuget/packages'... Your package was pushed. ========== Rebuild All: 1 succeeded, 0 failed, 0 skipped ==========
STEP 4. Set up the deployment process
In this step you will set up the deployment process, using the components created in previous steps. In step 3 you created a NuGet package and pushed it to your Octopus deploy server. Here you will configure Octopus to create a release, and deploy the package to the Integration environment in DXC Service.
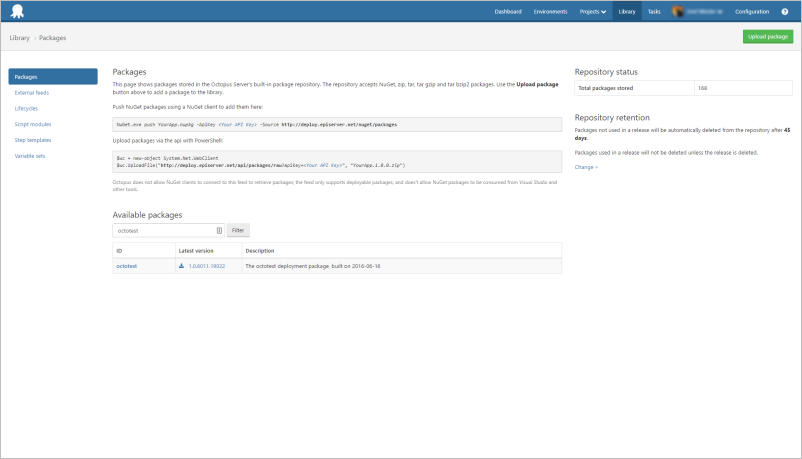
In Octopus, go to Library > Packages. Search for the project under Available packages, and ensure that the package you created in the previous step, is available.
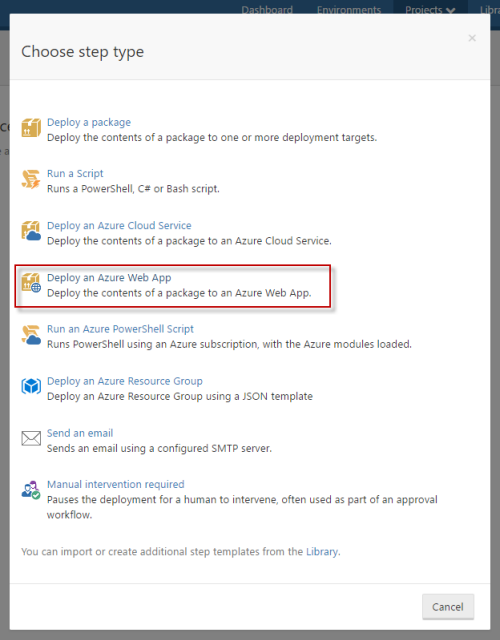
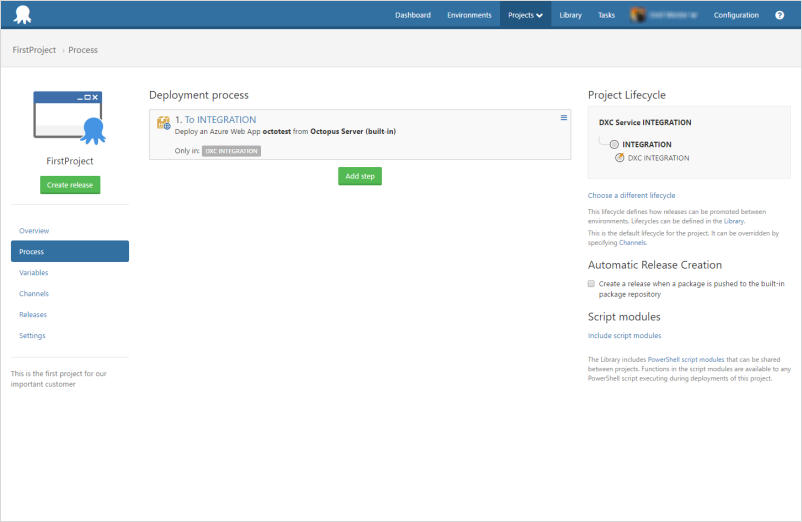
Go to Project > Process, click Add step, and select Deploy Azure Web App.
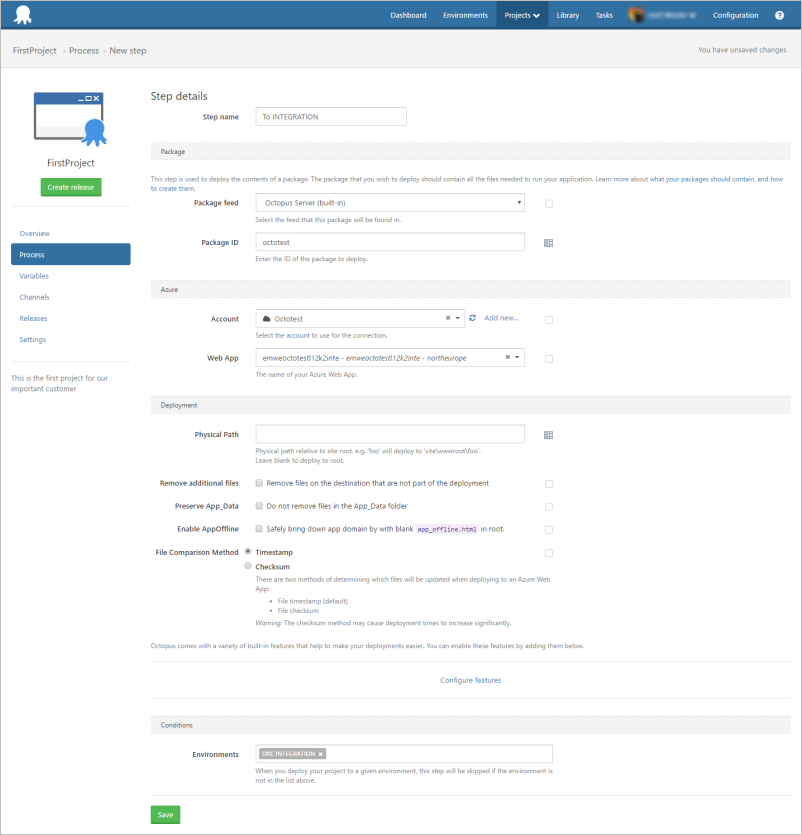
Enter values forStep name,Package ID(project name), name of yourWeb App(suggested by default) and the Environments condition. Note that under Web Apps, you have the option to use slots, if slots are part of the provisioning of your Integration environment.
Click Save, and verify the deployment process.
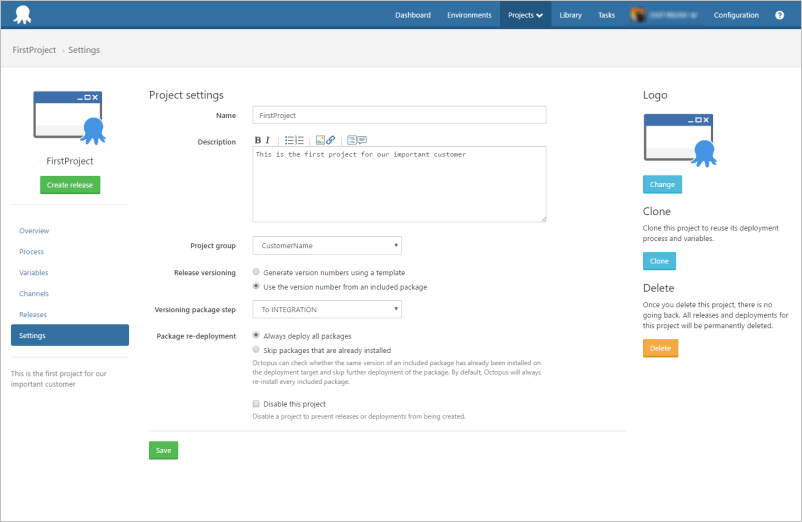
Go to Settings for the project, add values as below and click Save when done:
Name, description and project group.
Release versioning - select Use the version number from an included package.
Versioning package step - select INTEGRATION.
Package re-deployment - select Always deploy all packages.
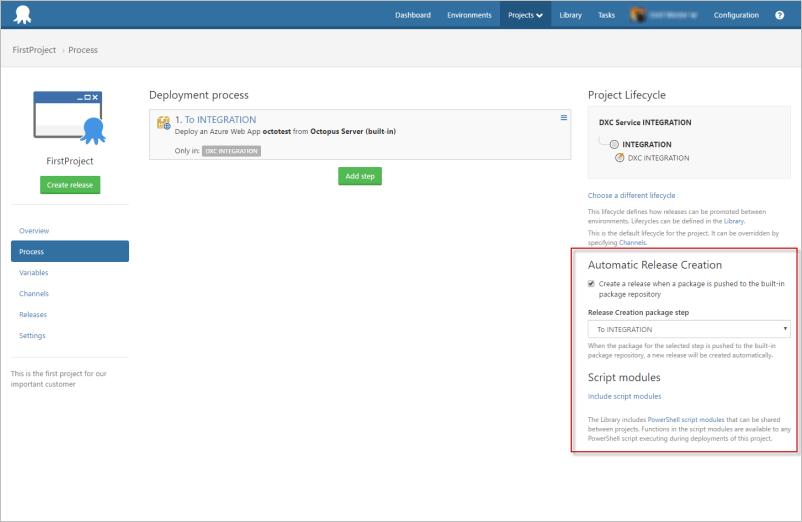
You can configure the process to automatically push a release to the Integration environment, every time you build your project and a package is pushed to your Octopus server. Select this in theAutomatic Release Creationsection on the Process page of your project.
When you have built your first project and created a release following the steps above, go the URL provided in DXC Services for the Integration environment, to verify that the website is working.
Deploying changes
If you have set up your deployment tool as described above, code changes and Episerver updates done by your team will be pushed to your build and deploy servers, whenever you build. From there, a release will be automatically created (if you selected that option), and pushed to the Integration environment in the Azure cloud.
You can use the Integration environment to regularly test and verify your changes, before deploying to production. Note that in DXC Service, deployment from Integration to the Production environment is managed by Episerver. See Deploying for more information.
Octopus Deploy has the feature that you can ship some powershell scripts that are to be executed in the deploy, does DXC support that in the Integration environment? If so, is it also possible that these files are executed in the later environments?


Nice one!
Octopus Deploy has the feature that you can ship some powershell scripts that are to be executed in the deploy, does DXC support that in the Integration environment? If so, is it also possible that these files are executed in the later environments?
http://docs.octopusdeploy.com/plugins/servlet/mobile#Customscripts-ScriptsinPackages
Well done!
Very nice article but requires a little bit of updating.