Try our conversational search powered by Generative AI!
AI OnAI Off
| Views: | 10036 |
| Number of votes: | 1 |
| Average rating: |
Ask yourself what you want to measure. Is it the number of page visits, file downloads or form postings? Why limit yourself to one when you can use more than one KPI on the same page! And if you also add how much each visit, download or posting is worth (in money or points), you will be able to draw the conclusion of whether the campaign increases revenues or not.
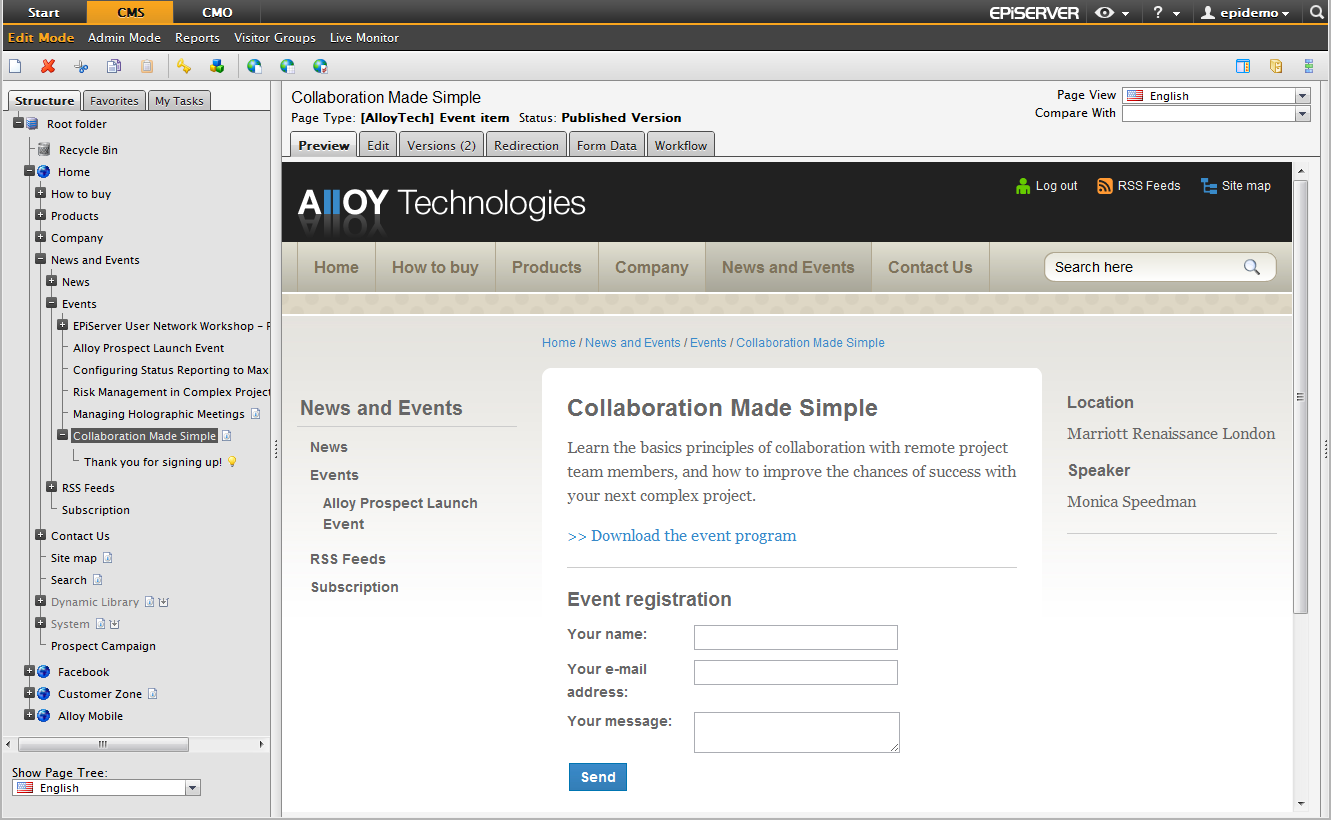
First add a couple of new unpublished page versions to the original page in EPiServer CMS Edit mode, and then add these to the LPO test as described in the next step. The example below shows a page with a form and link to a file to download. Add the conversion page you want to use as your target page, for example, a “Thank you” page that will show when the visitor sends the form (remove the page’s setting to be shown in the left navigation menu).
In this example personalized content is not shown, but you could of course also apply that to the test.
The original page and the conversion page shown in the tree structure.
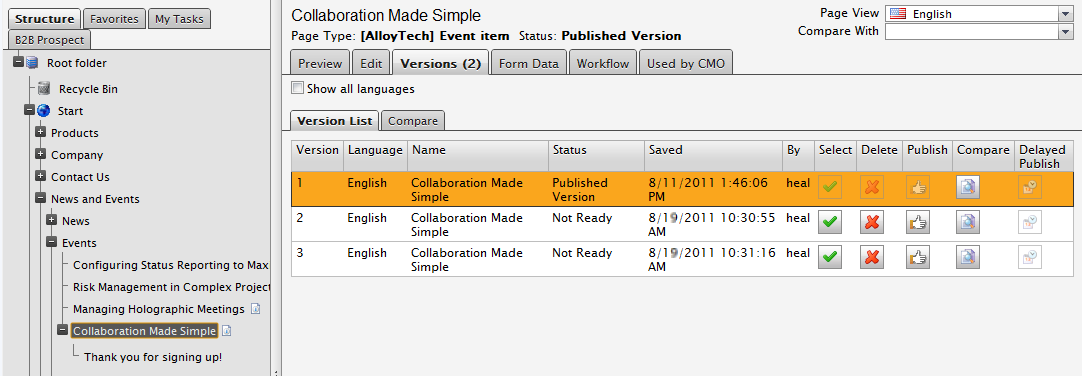
The published original page and the two unpublished variation pages in the version list. Note the Used by CMO tab.
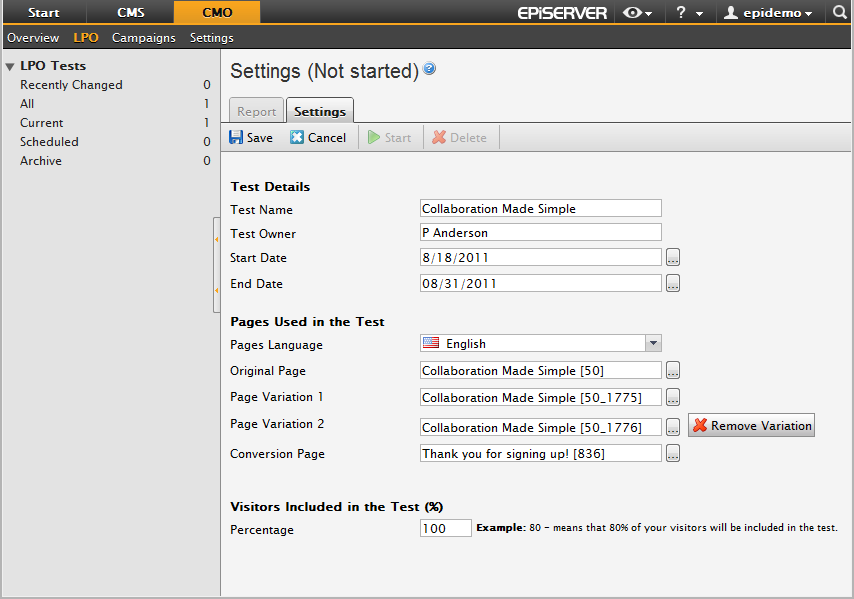
Click the Add Test button to define the settings for your LPO test. In this example you can add 100 percent of all visitors to the test only if you feel pretty sure that the variations are better than the original page and the visitors are few. Otherwise the percentage depends on how many visitors you have to the site. Save your settings.
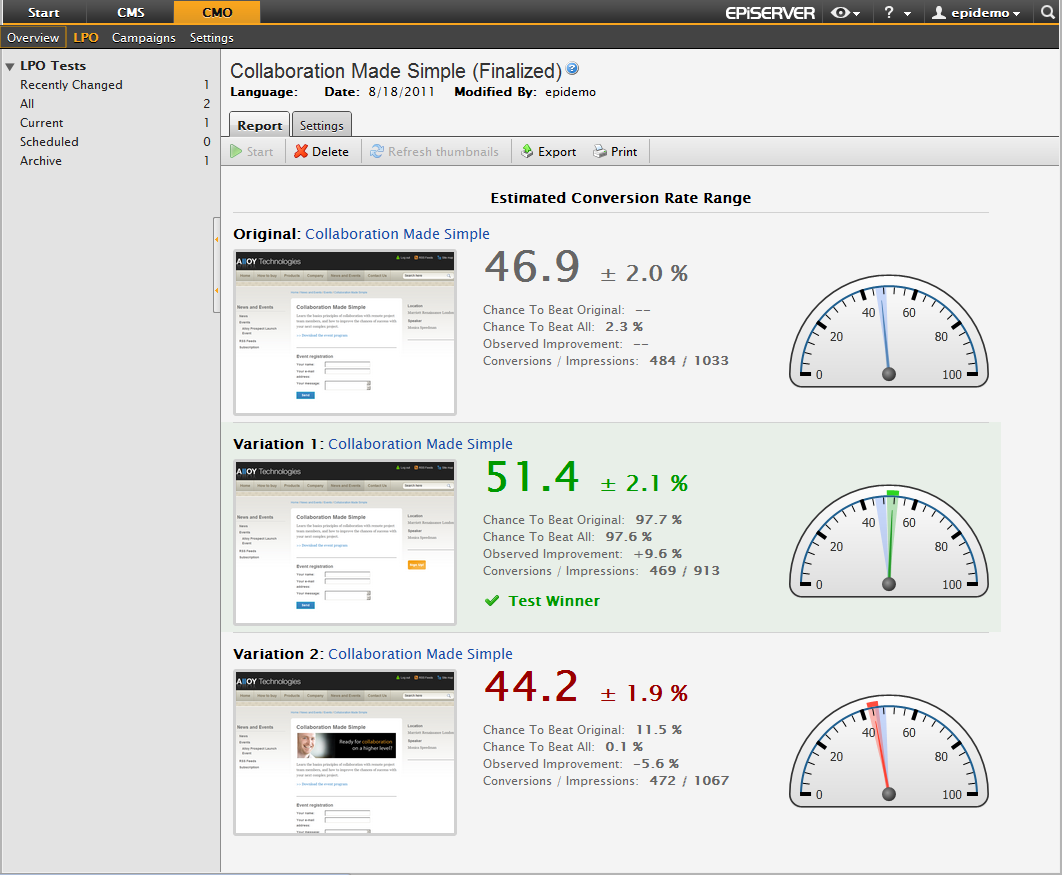
You can follow the test by using the CMO LPO Report gadget, which shows current statistics to estimate which will be the winning page.
Some of the visitors send the form and will then reach the conversion page. EPiServer CMO tracks the number of users who reach the conversion page after submitting the form to estimate which is the winning page. In this example it is almost certain that one of the variation pages will beat the original. So you can stop the test before the end date expires and select the winning page. The winning page is automatically published.
When you have selected the winning page, go to CMO Overview and click Add campaign to define the settings for the campaign.
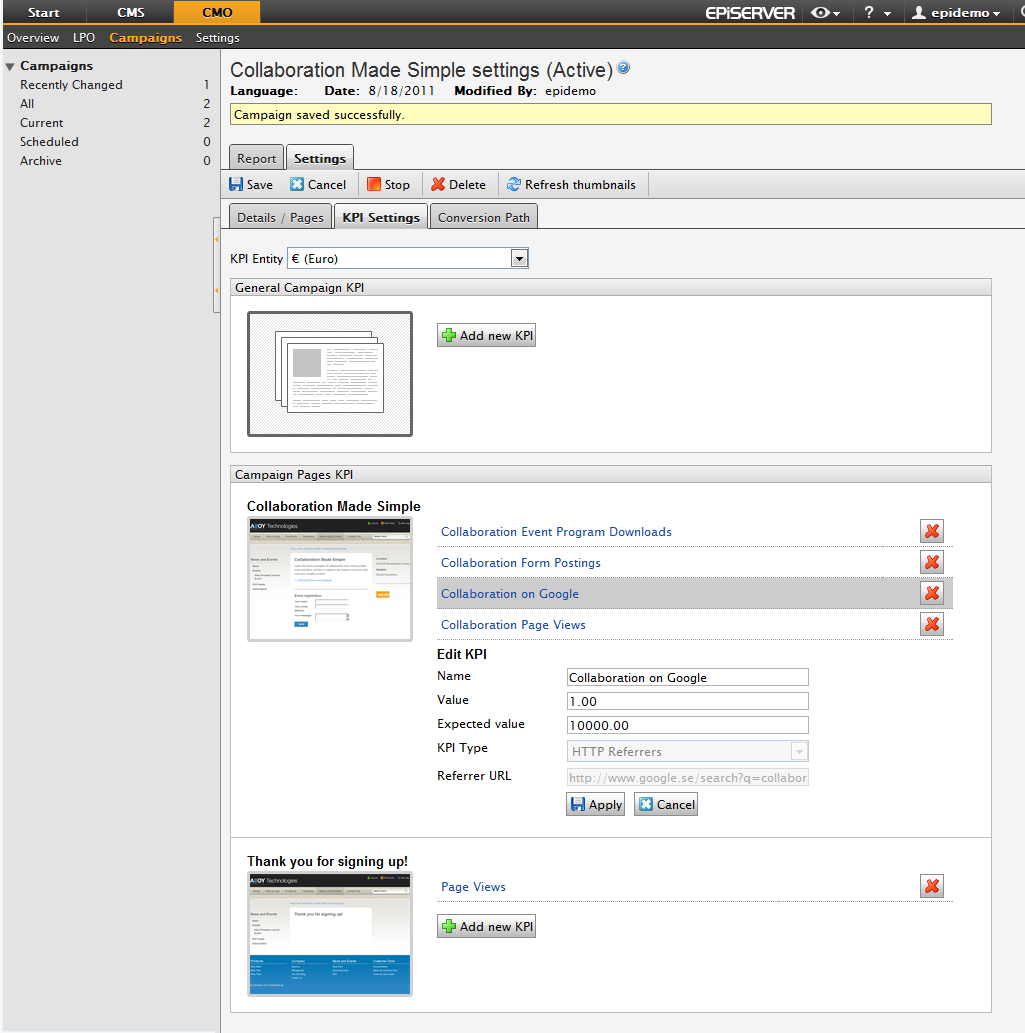
On the KPI Settings tab, click the Add new KPI button to define the KPI settings for the campaign. In this example the test will be started immediately (EPiServer CMO indicates the current date by default), but you can also schedule the date you want the campaign to start. Here the value for each KPI is set in money (Euro) and only for specific pages included in the campaign. Here the KPIs Page Views, Form, and Download are used. You could also use HTTP Referrers KPI – the URL of a search engine result page, for example, based on the search phrase “collaboration”. Save your settings.
In this example the Generic KPI (if you are using a web shop for your campaign), Conversion path KPI, and the settings on the Conversion Path tab are skipped.
You can follow the ongoing campaign by using the gadgets CMO KPI Summary and CMO Campaign Statistics.
Select the Reports tab for the campaign to analyze the campaign results, where you also can export and print them. For information about how to analyze the reports, please refer to EPiServer CMO 2 R2 Web Help.
